Showing posts with label MOFO. Show all posts

Saturday, September 28, 2013

MoFo 2013 - Day 28 - Za'atar Seasoning

Z is for Zucchini and Za'atar

Zucchini is one of my favorite Z words. When I visit my family back in Illinois in the summer, my brother's garden is usually brimming with crazy amounts of zucchini. We've finally had success growing it here in AZ too. It is a very mild, so you can use it in so many dishes.

I wanted to combine it something unique: Za'atar, an exotic spice from the Middle East. It is hard to describe the flavors. The sumac is bright and almost citrus like in flavor, but not quite. I knew I had purchased some for some recipe I wanted to make, but I had no idea where it was stashed. After a crazy pantry search I found it! Toasted sesame seeds are a must. There is debate on the green spices: thyme, marjoram and oregano. I decided to use both thyme and oregano in my mixture.

I found a lot of different recipes for Za'atar and it is true that the spice mixtures are different depending on what part of the region the mixture comes from. Forgive me if I have bastardized any tradition, but this is my take on Za'atar. You can easily double this recipe.

Za'atar Spice Mixture

1 tablespoon toasted sesame seeds
1/4 teaspoon cumin seeds
2 tablespoons sumac
1 1/2 tablespoons dried thyme
1/2 teaspoon salt
1/4 teaspoon oregano

Lightly crush sesame seeds and cumin seeds to release their flavors. Mix all ingredients together and store in an airtight container for up to 2 weeks.

I wanted to marry the mild zucchini with the aromatic Za'atar. Recently, I had gone to a local restaurant and had some amazing zucchini chips. I thought the chips and the seasoning would be a great combo. So for the first time, I attempted frying in coconut oil. Check out this weird foaming action.


Sadly the chips came out very greasy. I have ideas on how to remedy this situation in the future. I think they need to be dried before they are fried. But this fine evening I could not give up on my Za'tar and zucchini marriage dream.


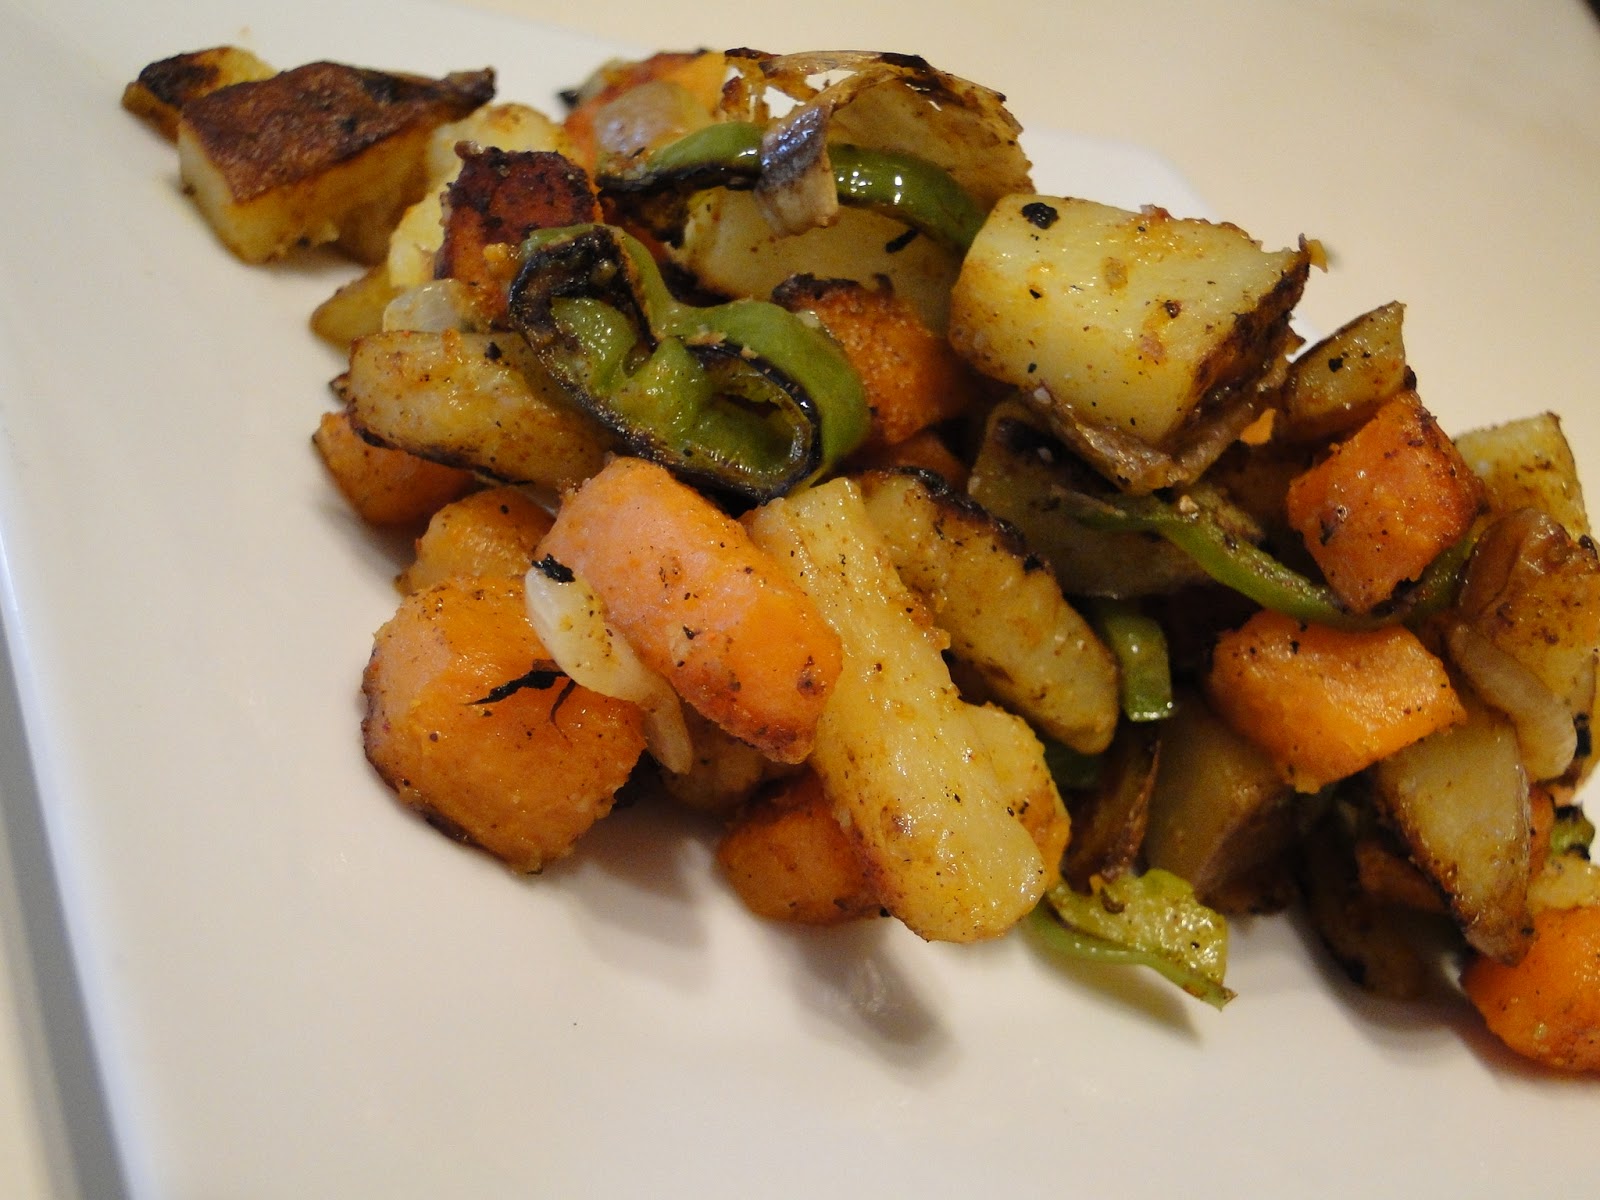
So I went on to take some very thin slices of zuchs and bake them with a little Za'atar sprinkled on them. Better, but still not what I wanted.


Third attempt was the best. I again took thinly sliced zucchini. This time I stirred it up with some white wine vinegar, olive oil, garlic, Za'atar and fresh chopped jalapeño. I'm going to have to get back to you on the measurements. Recipes allude me after a couple of glasses of wine. I just start throwing shizzle together and don't pay attention. This was good enough to measure and write up. So after I get some sleep and chill out a little. I will make another batch and post the amounts here. In the mean time, here is a picture of the "pickled" yum.


Z is the end of the alphabet, but certainly no the end of MoFo for this year. 

Oh, don't think I forgot about the giveaway! The winner of the Upton's Naturals giveaway is...

#2 Cadry!!! Congrats! I will be contacting you to send the vouchers. I can't wait to see what you are going to do with those awesome Upton's goodies!!!


Thursday, September 26, 2013

MoFo 2013 - Day 26 - Y is for Yammy, Jammy Breakfast Sammy

I went very outside of my box for todays post. I am a huge fan of savory yam creations. I never put brown sugar and other sweet stuff in my yams because I feel they have a great sweetness all on their own. I am also not a huge fan of sweet stuff for breakfast. So today I bring you a sweet breakfast sandwich with caramelized yams! I am surprisingly happy with the results.


Yammy, Jammy Breakfast Sammy

Makes 2 Sammys

1 medium yam, peeled and sliced thin (about 1/4 inch)
1 tablespoon Earth Balance Butter Stick
1 tablespoon dark brown sugar
1/2 teaspoon cinnamon
2 teaspoons brandy
2 raisin bagels or English muffins, split
1 banana, sliced
3 tablespoons your favorite nut butter (I found a pecan one that was killah!)
3 tablespoons pear jam or fruit spread

In a small saucepan place yams with enough water to cover by 1 inch. Turn heat to medium and bring to a boil. Turn heat to low. Simmer until yams until they can be pierced easily with fork.

 Rinse and drain. In a 12 inch non-stick pan heat Earth Balance over medium heat until melted. Stir in brown sugar  and cinnamon and cook until sugar has dissolved. Add yam slices in single layer.

While yams are caramelizing, place bagel in toaster and toast until golden brown. Saute yams for about 2 minutes. Turn and saute for 2 more minutes. Add brandy and saute for another minute or so, until liquid dissolves. Add bananas and cook about 30 second per side making sure to get bananas covered in caramelized butter. Bananas will cook very quickly, so remove before they turn to mush.

On bottom half of bagel, spread 1 1/2 tablespoons of nut butter. On top half of bagel, spread 1 1/2 tablespoons of pear jam. Layer warm yams and bananas on bottom half. Top and eat immediately.

Let the sugar buzz commence!

Tuesday, September 24, 2013

MoFo Day 24 - W is for Wingz and Wasabi Mayo

W is for Watching Football, Wingz and Wasabi

I'm writing this post during Monday Night Football. The reason I mention that fact is that Wingz to me are the quintessential football snack. They were the thing that was hardest for me to give up when I stopped eating meat. I'm so happy I didn't really have to give up anything, but have gained a new friend in these tempeh wingz. Fred is not a fan of tempeh, so I got to eat more. He did love the sauce, so I will be making a seitan version for him in the future. But I wanted to make something gluten free for those of you who must abstain. I had to keep one toe in Asia for this one!


Wingz with Wasabi Dipping Sauce

Makes 2 football sized servings (8 pieces)

1/2 cup soy milk
1 tablespoon tapioca starch

3/4 cup oat flour or your favorite GF flour
1 teaspoon granulated onion
1 teaspoon granulated garlic
1 teaspoon smoked paprika
1/2 teaspoon salt

1 - 8 oz package tempeh torn into 8 similar sized pieces

Grapeseed or other mild oil for frying.

4 tablespoon Earth Balance butter
2 tablespoons Louisiana Hot sauce
1 tablespoon Chile Garlic Sauce

In case you were wondering about what the chile garlic sauce and Wasabi looked like:


1 recipe Wasabi Dipping Sauce (recipe below)

Wasabi Dipping Sauce

Makes about 2/3 cup

1/2 cup vegan mayo
2 tablespoons unsweetened soy milk
2 teaspoon wasabi paste
1/2 teaspoon dried parsley
1/4 teaspoon five spice powder
1/4 teaspoon black pepper

Steam tempeh for 10-15 minutes until softened a bit. Let cool enough to handle.

While tempeh is steaming, whisk soy milk and tapioca starch together in wide shallow bowl. In another wide shallow bowl combine oat flour (can sub your favorite GF flour), granulated onion, granulated garlic, smoked paprika and salt.

In a 12 inch iron skillet or heavy bottomed skillet (not non-stick) heat enough oil to come up the side of the pan about 1/2-3/4 inch to 350. Soak each piece of tempeh in the soymilk mixture. Dredge in flour mixture until covered on all sides. Gently place coated tempeh in oil. Fry for about 4 minutes each side until golden brown. Remove from oil and drain on paper towel to remove excess oil. In a large bowl, combine melted Earth Balance, Louisiana Hot Sauce and chili garlic sauce. Add fried tempeh wingz to sauce and gently stir to coat. I lots of sauce, so it will be messy! Serve immediately with celery sticks, carrot sticks and Wasabi Dipping Sauce.


Go Bears!

Monday, September 23, 2013

MoFo 2013 - Day 23 - U is for Udon with Upton's Seitan!

U is for Unbelievable. It is day 23 and the posting is still going strong. It's been an unbelievably fun MoFo for me this year. I have made it a point to visit other blogs on a fairly regular basis and it has been a blast! I have been using www.randommofo.com to find new blogs. I've also visited the MoFo threads to see who is blogging regularly. There are so many dedicated MoFo-ers out there. I hope you get a chance to visit lots of them.

Brought to you by the letter U - Upton's Naturals Seitan and Udon!


Upton's makes some really great seitan products. They offer four different varieties of ground seitan and bacon seitan. This was the first time I had the opportunity to try their ground seitan. I love the fact that their ingredients are all natural and simple. I was thrilled that the ground seitan held it shape and texture during the cooking process. I love Soyrizo, but the texture of that would have turned it to mush in this dish*. Take a look at the ground seitan! It really looks like ground meat eep!


I've been in the mood for some Asian inspired stuff lately. The letter U has provided me the opportunity to scratch that itch. Udon is a simple comfort food dish in Japan that consists of a simple broth made with mirin, soy sauce and dash (a simple broth that is said to have Umami properties). It can be served as a soup or a noodle dish. I made it as a noodle dish here, but have given instructions on the soup version as well. In Japan, there are regional differences on how Udon is made. I've added chorizo and jalapeños for my own Southwestern regional touch.


Uncle Sancho's Udon

1/4 cup dulse tossed into cooking water for noodles
 6 oz dried Udon noodles
Water for cooking noodles

1 tablespoon olive oil
1 - 8 oz package Upton's Naturals Chorizo Seitan (or you favorite chorizo)*
1/2 medium yellow onion, very thinly sliced
1 - jalapeño, seeded and minced ( I used a red one)
1 cloves garlic, minced
1 teaspoon minced picked ginger
1 tablespoon Mirin
2 cups finely shredded cabbage
1/4 cup thinly sliced green onions for garnish
chopped cilantro for garnish (optional)

Cook noodles according to package directions, but toss dulse flakes into cooking water. Dran and rinse noodles under cold water, leaving dulse in noodles. If you are making the soup style version, reserve 3 cups cooking liquid and stir in 1 1/2 tablespoon red or brown miso.

In wok or large saute pan heat olive oil over medium heat. Add seitan and saute until just starting to brown, about 3 minutes. Add onion and saute for about 3 more minutes until onions are starting to soften. Add jalapeño, garlic and pickled ginger. Saute for until jalapeños start to soften, about 2 minutes. Add mirin to pan and deglaze removing browned bits from bottome of pan. Add cabbage and saute until it is just starting to soften, about 2 minutes. Toss in noodles (and cooking liquid if making the soup version) and cook until noodles are warmed through, about 3 minutes. Separate into 4 large shallow bowls. Garnish with green onions and cilantro. Serve immediately.

First I am going to tell you about today's Upton's giveaway! Upton's is sold online and in many states here in the US. One lucky commenter will win two coupons for one free package of Upton's Naturals Seitan. One just wasn't enough. If you are the winner, I totally recommend trying the bacon and one of the ground flavors. Leave a comment about how you think you might use Upton's seitan before midnight this Friday, September 27th, 2013. Winner will be randomly selected on Saturday!

Speaking of winners, it is time to announce the winner of Judita Wignall's Raw & Simple. The winner is:


#3 Kelly of Vegan Kid blog! Kelly, I will be emailing you to get your shipping address! Congrats!!

Saturday, September 21, 2013

MoFo 2013 - Day 21 - S is for Spinach Scramble

No plant based diet would be complete without the scramble. This is a great way to introduce friends to tofu. In this role, tofu is very unassuming. I can hardly tell the difference between scrambled tofu and scrambled eggs.

Scrambles are fun too! Like bowls, you can make any themed scramble you choose. They are a great way to use up leftovers in the fridge too. Turmeric is used to give scrambles that sunny yellow color people associate with scrambled eggs and adds some great health benefits as well. Another great thing about scrambles is they are fantastic to roll up in a tortilla for breakfast on the go.  They have no cholesterol. If you are gluten-free, use a gluten free soy sauce and you are set to go!

I like to get all of my ingredients prepped and ready to go before I start cooking as the process goes pretty fast.


Spinach Scramble

Makes 4 Servings

2 teaspoons olive oil
4 oz. cremini mushrooms, sliced thinly
1/2 orange or red bell pepper, medium dice
1 clove garlic, minced
2 teaspoons low sodium tamari or soy sauce*
1/2 teaspoon turmeric
1/4 teaspoon thyme
1/4 teaspoon black pepper
1/4 teaspoon salt
1/2 teaspoon herbs de Province
1 - 12 oz package extra firm tofu with water gently squeezed out, crumbled
1 tablespoon nutritional yeast
1 1/2 cups chopped fresh spinach

Heat a 12-inch iron or non-stick skillet over medium heat. Add olive oil, mushrooms and bell pepper. Saute until mushrooms start to soften and release some of their liquid, about 3-5 minutes. Add garlic and saute for about 30 more seconds. Pour in tamari and saute for about a minute until all of the liquid is gone, about 1 minutes. Add turmeric, thyme. black pepper, salt and Herbs de Province and saute until herbs are just fragrant, about 30 seconds. Add crumbled tofu and nutritional yeast. Saute until tofu is heated through, about 3 minutes. toss in chopped spinach and saute until spinach is just wilted, about 2 minutes.

Garnish with chopped chives and grated vegan cheese (optional).

* If you use regular instead of low-sodium, cut back on the amount of salt.

Use GF tamari and this recipe is GF!!!


Thursday, September 19, 2013

MoFo 2013 - Day 19 - R is for Raw

I'm not going to go into great detail on raw today. I recently did two posts on Raw and Raw author Judita Wignall in THIS post and THIS post. I do want to say that when I am eating raw, it's been easy, tasty and makes me feel very energetic. You don't have to have a crazy amount of special equipment to do some raw stuff. A food processor, a good blender, a good knife, cutting board and you are ready to get started.

I haven't done a giveaway all MoFo, so I think it's about time. I have another Judita Wignall book to share: Raw and Simple. In this volume, Judita offers more tips on the benefits of the raw diet, how to get yourself set up in the kitchen and great recipes.

I decided to try out Her Meat and Cheese Pierogies (pg. 132). It has several components, most of which can be made ahead of time. I made the "meat filling" the "cheese filling" and Creme Faiche ahead of time. When I got home later in the day, all I had to do was thinly slice turnips for the wrappers and cut up some chives for garnish. Honestly, I thought the creme fraiche was an unnecessary addition. I actually thought the balance of flavors was better without it.


This book, like her first one is full of beautiful pictures. She offers very handy nutritional advice. What I love about this book is that the recipes are truly simple. It makes raw less scary for those who feel a little intimidated about how to get started. 

Now it's your turn. Leave a comment about what intimidates you about raw "cooking" by midnight MST Sunday, September 19th for your chance to win a copy of Raw & Simple! Good News!! US, UK and Canadian folks are all eligible to win. The winner will be randomly selected on Monday. Please make sure to leave a way to contact you if you are the lucky winner. Good Luck!!!

Wednesday, September 18, 2013

MoFo 2013 - Day 18 - Q is for Quinoa

2013 has been declared the International Year of Quinoa by the United Nations Food and Agricultural Organization. Often mistaken for a grain, this versatile and nutrient rich seed couldn't be more well suited for this honor. It's a complete protein, has lots of fiber, iron, magnesium and B-6. It's so quick cooking and can easily stand in for longer cooking rice in lots of dishes.

Quinoa is super easy to prepare. There are a few important tips to remember when preparing quinoa. This will ensure fluffy awesomeness.

1 - Make sure to rinse. Quinoa has a substance called saponin that can make if very bitter. Place quinoa in fine meshed strainer and rinse in cold water until it runs clear.

2 - Many people swear by a 2-1 water to quinoa ratio. I end up putting a little bit less water in to account for the water left from the rinse (for 1 cup dried quinoa, I use 1 7/8 cup water)

3 - Be patient - cook for 15 quick minutes. Turn heat off and let it sit for 10 minutes. Then lift the lid and fluff with a fork.

That's it.

When I am being semi-organized, I try to prep some stuff on the weekend for quick weekday meals. Bowls are a great way to do one dish meals and quinoa is the perfect grain for them. Heat up your favorite grains (quinoa, rice, millet, etc), add a protien (nuts, beans, tofu, tempeh, seitan), throw in your favorite sauteed veggies and a sassy sauce and you are good to go. You can get creative by using lots of different profiles from all over the globe for your own quinoa bowls: Asian, Mediterranean, Indian, you name it.

Not surprisingly, I did a little Southwestern twist on my bowl. You can re-heat leftover quinoa or make fresh.


Texas Quinoa Bowl

Makes 4 servings

2 cups cooked quinoa, heated
2 cups home made or store bought vegan chili
1 cup vegan queso
chopped fresh cilantro for garnish
tortilla strips for garnish (optional)

Heat chili and queso. In a bowl layer with 1/2 cup warmed quinoa, 1/2 cup chili, 1/4 cup queso. Garnish with cilantro and tortilla strips.

Eat hearty!

Tuesday, September 17, 2013

MoFo 2013 - Day 17 - P is for Pomegranate Cafe

I seriously can't believe I didn't do a potato post today! If you know me you know that potatoes are my love and passion. They had to get a mention today on what is truly their day!

However, I have another passion. It is dining out at great indy restaurants. Pomegranate Cafe has been a favorite of mine for a long time. I'm excited to report that they are now open for dinner. They have expanded their dining room to almost double what it was before. Their menu is full of great sandwiches, salads, soups, quesadillas, fresh juices, elixers, fresh home made pastries and fantastic coffee.


They also host many guest speakers and cooking classes. I have always loved the fact that they highlight local and fresh ingredients. It's a great place to take your girlfriends for a special lunch and your meat eating friends for a really fantastic dining experience. Plus they have cute table decorations.


We lucked out on our last visit. Their special started with P! Yep, that was a sure sign I was supposed to use them for my P post. Without hesitation I ordered the Portobello Burger and the signature Pomegranate Chocolate Raspberry Cake. The Portobello burger was topped with a mountain of fresh veggies, roasted red peppers and a delicious rosemary aoili. I loved the option of a side kale salad and the roasted potatoes, well you know I love those. I almost licked my plate.


If you haven't yet been to Pomegranate Cafe, you should go for their signature cake alone! You won't believe it is vegan. It is moist, rich and bursting with rich chocolate flavor with just the right amount of pomegranate. It is hard to visit without getting a slice.


So lets count the P's in this post: Pomegranate, portobello, pepper, potatoes, perfection. Yep, I think we have the p's covered.

Pomegranate Cafe
4025 E Chandler Blvd. Ste 28
Ahwatukee, AZ
480-706-7472

Hours:

Closed Mondays
Tues - Saturday 8am-8pm
Sunday 8 am - 4pm

Monday, September 16, 2013

Mofo 2013 - Day 16 - O is for Onions

Oh onions, what a boring world it would be without you. I truly feel sad for people who hate onions. I love them in so many ways. They bring such great flavors to so many dishes.

Onions come in 4 general varieties with many variations of each: yellow, red, white and green. Yellow is by far the most common in the US. Red ones can add beautiful color to many dishes. The white varieties are the ones used most in Mexican cooking. The green varieties, scallions and chives are great sprinkled on top of all sorts of yummies including two of  my favorites: baked taters and nachos.


They are part of the Allum family. The humble onion has been used not only in cooking, but can also be rubbed on the skin as an insect repellent. I'm guessing by the way you will smell, it might end up being a human repellent as well. Studies have indicated that the onion can help prevent certain diseases and illnesses including heart disease and ulcers. If you get stinky onion breath, don't fret. Eat a couple of sprigs of parsley to get you back to kissable.

Onions are super versatile. You can slice them raw and put them on sandwiches and salads. Dice them up for tacos and pizza. Throw them on a skewer with other goodies and grill them. They are great in chutney, soups, stews and relishes. Oh and of course, we can't forget the addicting onion rings.

Before I gave up the beefs, I used to LOVE french onion soup. It is traditionally made with a concentrated beef stock. It is honestly super easy to make a vegan version of the soup itself by subbing a strong veggie stock. Instead of covering the crock with melted cheese like the traditional version, my version makes use of sliced stale baguettes to serve as a raft for the gooey cheese.


Onion Soup (of the French variety) with Cheezy Croutons

Makes 4 servings.

2 tablespoons olive oil
4 medium onions (I like to use a combo of red and yellow), halved and sliced very thinly
2 cloves garlic minced
1teaspoon dried thyme
1 teaspoon salt
1/2 teaspoon black pepper
1/4 teaspoon dried rosemary, crumbled between your fingers
1 bay leaf
1/3 cup red wine
5 cups vegetable broth
2 teaspoons kitchen bouquet (optional, but highly recommended)
1 1/2 teaspoons vegan Worcestershire sauce

12 slices baguette
olive oil for baking
1/2 cup shredded white vegan cheese (I used Daiya Havarti)

In a heavy bottomed soup pot heat olive oil over medium-low heat. Add sliced onions. Saute until onions are golden brown and caramelized, about 20 minutes. (This makes the onions beautifully sweet). If pan gets dry, add a touch of water so onions won't stick. Add garlic and saute for about 1 minute. Add thyme, salt, pepper and rosemary. Saute for another minute until fragrant. Deglaze with red wine. Saute until liquid is mostly evaporated. Add vegetable broth, kitchen bouquet and Worcestershire sauce. Simmer for 20 more minutes. Soup can be made ahead of time and kept in the refrigerator for up to a week.

While soup is simmering, preheat oven to 400 degrees. Brush both sides of baguettes slices with olive oil. Bake for 7 minutes. Turn and sprinkle with about 1 tablespoon cheese. Return to oven for another 7 minutes or until cheese is melty and bubbly.

Ladle soup into bowls and top with 3 cheezy croutons. Serve immediately.

Sunday, September 15, 2013

MoFo 2013 - Day 15 - Nutty for the Letter N

We're half way there folks. Day 15! I went a little nuts today. Pun intended. Nuts are so versatile it was hard to keep this post within reason. I'm going to post the cliff notes version. Nuts are packed full of quick and easy nutrition. They have protein, omega-3's, minerals, anti-oxidants and healthy fats. They are pretty high in fat, so use them sparingly in your well balanced diet.

The great thing about nuts is they can be eaten so many different ways. Simple can be best, especially when you are in a hurry. Grab a hand full of nuts for a healthy snack. They are often available out of the shell for convenience. Grocery stores with good bulk departments will offer raw, roasted and flavored varieties. When using nuts in raw recipes, it is best to soak them first. Spread nut butters on bread or veggies for a quick snack. PB & J's are pretty darn healthy if you chose those without a lot of added sugar. Nuts can be added to savor and sweet dishes. They make great garnishes too!

Here is just a sampling of the many nuts to enjoy. Starting from top left (going clockwise): cashews, walnuts, pine nuts (piñon nuts), almonds, macadamia nuts, hazelnuts, pecans (center).


I have been buying commercially made almond mild for a long time. Most of the brands I have been able to find contain carageenan. There are certain forms of carageenan that are suspected carcinogens, so I try to stay away from products that contain this ingredient as I am not sure which type might be in the product. I love almond milk and use it a lot in baked goods and on my cereal. While it may not be less expensive, making your own is a snap and you will know exactly what went into it.


First, soak one cup in filtered water overnight. Rinse and drain the almonds and throw them in the blender with 4 cups of filtered water and 1/2 pitted date (you can use a whole one if you like your milk a bit sweeter). Blend until well combined and no large chunks remain.

Take a nut-milk bag (this is an inexpensive nylon bag you can find at many health food stores and Whole Foods) and place it over a large bowl or pitcher. Pour mixture into bag letting it drain into bowl.


Gently squeeze the contents of the nut-milk bag until no more liquid comes out. You can dry the solid remains and grind into powder to use in baked goods. You should get a little more than one quart. I drink a little then store the rest in a tightly sealed quart Ball jar in the fridge.


Today I had to head to work after making my almond milk. I am fortunate enough to have a little kitchen in my office. My old Vitamix is there so I can whip up healthy smoothies and soups right there at work. Today I had the pleasure of using my freshly made almond milk. This quick smoothie is full of the goods: lots of protein from the hemp seed and almond milk, potassium from the banana, vitamins, minerals and antioxidants all around.


Banana-rama Smoothie

Makes 1 - 2 cup smoothie

1 cup fresh almond milk (or your favorite)
1 large banana (frozen is best)
1 tablespoon cacao nibs
1/2 teaspoon cinnamon
1/2 vanilla bean, scraped or 1 teaspoon vanilla extract
1 tablespoon hemp seed
1/2 teaspoon maca (optional)
1/2 cup ice

Place all ingredients in blender. Pulse to combine ingredients, then blend until smooth. Pour and enjoy.

It's really easy to snack healthy. Make this smoothie in the morning or the night before for a great snack for work or school. 


Saturday, September 14, 2013

MoFo 2013 - Day 14 - M is for Mexican in Monterey!

You heard me right. All Vegan All Mexican All the Time!!!

After hitting Gilroy on our way to Monterey, we headed toward the coast. I was very surprised at how few vegan options there were to be found in this beautiful place. I always associate Cali with fresh, local produce as they are such a huge producer of such. I guess I should have realized this area is very seafood focused as there is a wharf and Cannery Row right there.

Two days into the trip, I was ready for something besides pasta and salad options. Don't get me wrong, they were delish and the sourdough bread was TDF. Can you say carb overload? But I wanted to sink my teeth into some more creative vegan fare.

My wish was granted when we finally made our long-anticipated stop at El Cantaro right there in Monterey. El Cantaro just opened their doors in May. We had been kayaking and our guide was kind enough to drop us right out front of the restaurant. When the van door opened, I sprinted inside I was so flipping excited.

There was another girl from Dallas taking a picture of this sign at the same time I was! She was equally excited to discover such a place.


We timed our visit just right. When we walked in there was only one person in line in front of us. The huge menu above the counter was all vegan! The open kitchen was clean and compact. Three friendly employees including the owner were happy to help. We grabbed the printed menu and sat down to try and choose from the great variety of Oaxacan style Mexican fare. The Oaxacan region is known for it's wide variety of cuisine and their creative uses of chocolate. Many of the traditional dishes include Oaxacan cheese, but this food didn't need any of that.


As we waited for our food, many more people started to arrive. The place was hopping. There were people of all ages. I saw a couple that must have been in their 60's, a young lady in her 20's and a family with young kids. I was excited to see such a variety of people supporting a new local vegan place. The owner is a Seventh Day Adventist who follow a diet emphasizing wholeness and health. This includes following a clean vegetarian diet. She wanted to open a place that offered lots of delicious options for people who believe in eating the same way.

Chile rellenos were one of my favorite non-vegan Mexican dishes, so that had to happen. These actually ended up being Fred's favorite of the bunch. I loved that the chile was big and substantial with thick meat on it. Often the chile to breading ratio is out of balance on rellenos, these were good! They had creamy vegan cheese in the middle. The breading was a bit heavy, but tasty. I loved the traditional thin red tomato sauce as well. 


We chose the "beef" enchiladas so I could try their vegan meat. I was having a hard time deciding on green or red sauce, so they offered to put both on which ended up being a great call. They filling had a great texture. I couldn't decide which sauce I liked better, I was happy there was plenty of sauce on the enchiladas as I am a very saucy girl. The red sauce had a slight sweetness to it, which I suspect may have been a little chocolate which the Oaxacans are famous for using in many of their dishes. The green sauce was even yummier with a little more heat.


Fred ordered the Fish Baja Style Taco with the pineapple salsa. He opted for the pineapple salsa. The fresh flavors of the salsa and guacamole made me feel like I was at a Mexican taco stand at the beach. I loved the combo of the tart salsa with the creamy Baja Sauce.


I ordered one of their famous Crispy Potato Tacos. I wish I would have written this right when I ate it, because now I can't remember everything that was on it. What I do remember, however, the crispy potato tortilla was incredible! I must figure out how to create one of these for my cookbook. It was perfectly crunchy and held together very well. The fillings were delicious and there was a perfect amount of vegan cheese on top. 


The service was great. The food is made fresh to order, but still came out pretty quickly. The staff members were all very friendly. They made a lot of great suggestions on what to try and seemed to truly enjoy serving us.

I had planned on going back the following day to try some of the more traditional Oaxacan dishes:  Tlayudas, Negro Mole and tamales. Sadly, we got up a smidge late and didn't have time to completely fulfill my Mexican food fantasy before heading to the airport. But if you are in the Monterey area, you can fill yours! Bring your non-vegan friends too. They will love it.

El Cantaro
791 Foam Street
Montery, CA 93940
813-646-5465

Hours:
Monday-Thursday and Sunday 10am - 9pm
Closed Saturday
Friday 10am-330pm

Friday, September 13, 2013

MoFo 2013 - Day 13 - L is for Lentils, Lebanese if You Please

If Popeye were smart, he would have eaten his spinach with lentils. Why? Because these little guys pack an additional wallop of iron. There is 37% of the RDA of iron in one cup of cooked lentils. They keep your pipes clean too with lots of fiber. They are a fantastic source of low fat protein, 18 grams per 1 cup serving.

Not only are these little guys full of all sorts of good stuff for your body, they are relatively inexpensive. Add to that the fact that they are very versatile and cook up waaaay quicker than dried beans and you have an arsenal of reasons to love them.

This fine day I decided to make a one dish meal out of them inspired by Aarti Sequeira's Lebanese Lentils, Rice and Caramelized Onions (Mujadara). I change it up slightly by adding an extra cup of water and using brown basmati rice. I had to up the cooking time about 10 more minutes for the brown rice. It didn't have enough heat for my taste, so I added a teaspoon of hot chile powder. The downside to this dish is that it has A LOT of oil. I am sure you could cut back to half and it would still be yummy. I love the caramelized onion garnish! The picture isn't super colorful, but what it lacks in good looks, it makes up in taste. I'm going to throw some chopped spinach in for a one dish meal for lunch!


Thursday, September 12, 2013

Mofo 2013 - Day 12 - K is for Kick-Booty Kale Wraps with Kalamata Olives

K is for Kale. Some dub kale the new red meat, which might be a slight exaggeration. But kale is seriously good for you and packs a lot of nutrition in those beautiful emerald leaves. 1 cup of chopped kale contains a whopping 133% of the RDA of Vitamin A and 134% of Vitamin C. Amazingly it also contains 2.9 grams of protein. You get all of this for only 33 calories!!! OK maybe it isn't an exaggeration. This stuff rocks. I love to eat it raw in massaged kale salads. It's awesome to throw in soups. Oh and if you saute it with a little sesame oil, garlic, ginger and tamari, sprinkle with a little bit of raw sesame seeds you have an easy crazy healthy side dish.

Below are two varieties. The bunch on the left is regular green kale (red kale looks about the same with red ends). To the right is Dinosaur or Lacinto kale. I think this kale is the best for "beginners" to try as it has a more pleasing texture raw.


For K day, I decided to make something raw and gluten-free for those of you who are looking for more fun ways to eat that way. These pretty little rolls have lots of omega 3's thanks to the walnuts and lots of fiber and vitamins thanks to all of the fresh, fabulous veggies. Enjoy on their own or with some raw flax crackers.


Kick-Booty Kale Rolls with Kalamata Olive Flecked Walnut Meat

Makes 4 Rolls

1 cup raw walnuts, soaked overnight
8 fresh basil leaves, about 1/4 cup lightly packed
1 tablespoon chopped sun-dried tomato (oil packed)
1 clove fresh garlic, minced
1 teaspoon shoyu (if you want all raw) or tamari
1 teaspoon balsamic vinegar
1 tablespoon fresh lemon juice
2 tablespoons extra virgin cold pressed olive oil
6 kalamata olives
1 large carrot, grated
1/2 large red bell pepper, julienned
1 medium sized tomato, sliced thinly
1 handful of your favorite sprouts (I prefer pea or broccoli myself)

4 large kale (I use dinosaur or Lacinto), collard or chard leaves, taking care to remove woody part of stems but leaving large part of leaf intact.

Place walnuts, basil, sun-dried tomato, garlic, shoyu, balsamic vinegar, and lemon juice in bowl of food processor. Pulse together until mixture resembles a corse meal, scraping down the sides as needed. Turn processor to on and drizzle in olive oil, scraping sides between additions as needed. Once mixture is combined, add olives and pulse until olives are chopped coarsely.

If using kale leaves, spray lightly with lemon juice and lightly massage to make leaves more pliable. Place 1/4 cup walnut mixture on large end of leaf about 1 inch from the end. Top with carrots, a few slices of bell pepper, 2 slices tomato and sprouts. Roll fold in sides if leaves are large enough and roll up from large end to small end. Secure with toothpick. Serve immediately or refrigerate and serve the next day.


Wednesday, September 11, 2013

MoFo 2013 - Day 11 - J is for Juicing

Fred agreed to guest post for today. Here he is with today's post!

 “J” is for Juice. J is a multipurposed and important letter, just like juice. It can be a meal, desert, snack, or beverage. On the stock market it would have a very good performance/expense ratio, very little time or money compared to the benefits realized. 

Most know the nutritional values of the veggies in the picture so let’s go right to some helpful tips. Put in your juice what you like, make it taste good to you. Kim usually likes green juice with a little apple and ginger. I make that first, pour a big glass for her, and then add my carrot and beet. One juicing, two juices. 

Try peeling the root veggies, especially  beets. This will make your juice sweeter and cleaner tasting. The best juicing machine is the easiest and quickest to clean, one that is hard to clean takes the fun right out of everything. In 18 years of juicing my favorite is a ‘Waring”, which is also by far one of the cheapest (under $60). I have had mine for over 8 years with no problems. 

Lastly, make your first batches easy ones like carrots and apple. Later add cucumber or celery, and then venture on to spinach or kale. Mixing one thing at a time lets you decide on portion control and what you do or don’t like. Juicing, however, will not give you fiber so it is up to you to do the balancing act with cooked and raw veggies, (too much beet will make things very unpredictable though!). 

Just think, at the very least you are drinking one of nature’s very purest forms water. Carry on “J”!

Veggies waiting for a spin in the juicer


The final product (Kim Style)


Tuesday, September 10, 2013

MoFo 2013 - Day 10 - I - Scream You Scream

You got it. I is for ice cream! Who doesn't love a sweet creamy bowl of rich, delicious ice cream. The first ice cream parlor in America was opened in 1776, which just happens to coincide with the birth of our nation. Seriously, it is Americana in a bowl. I'm sure most of you have some great childhood memory that involves getting all sticky from your favorite frozen treat. My personal favorites growing up were good old chocolate chip and orange sherbet. I still love the simpler flavors, but my palate has matured and I like to try some unusual flavors as well.

I've tried a few different commercial brands with mixed results, so I am experimenting with making my own. I like the idea of controlling how much and what type of sweeteners I use Fred is more the ice cream eater than I am, so he is going to be the final judge of my efforts. I do have Hannah Kaminsky's Vegan A La Mode, but the last two times I went to make something from it, I've been missing important ingredients for the ones I wanted to make. There are some exciting flavors in that book that I am excited to try like White Russian Ice Cream, Banana Pudding Ice Cream, Mouse Tracks Ice Cream to name a few.

But this time around, I decided to create my own. I'm a little pre-mature, but I am starting to dream about fall and winter flavors. The holidays will be here before we know it. Put away your rolling pin. This creation is like a frozen version of pumpkin pie without the crust.


Pumpkin Pie Ice Cream with Toasted Walnuts and Pecans

Makes a generous quart

2 cups soy creamer, separated
1 - 15 oz can organic pumpkin puree (not pumpkin pie filling)
1 1/2 tablespoons arrowroot
1/4 cup maple syrup
1/2 cup dark brown sugar*
1 teaspoon vanilla
1 teaspoon cinnamon
pinch nutmeg
1/2 cup chopped walnuts, toasted
1/2 cup chopped pecans, toasted

In a small bowl mix arrowroot and 1/4 cup soy creamer and set aside. In a heavy bottomed saucepan whisk together remaining soy creamer, pumpkin puree, maple syrup, dark brown sugar, vanilla, cinnamon and nutmeg. Turn heat to medium-low and cook until mixture just starts to boil, stirring frequently to prevent scorching. Remove from heat and whisk in arrowroot mixture. Whisk for 3-4 minute until mixture thickens slightly. Place in refrigerator and make sure to chill for a few hours until mixture is COLD. Churn the ice cream in your ice cream maker according to the manufacturers directions. About 1 minute before it finished, pour in chopped nuts. Let go one more minute to combine. Place ice cream in airtight sealed container and freeze for at least 4 hours.


Monday, September 9, 2013

Mofo 2013 - Day 9 - H is for Hallelujah its Hatch Chile Season!

September is one of my favorite months of the year for a few reasons. This is the month that we usually start seeing cooler temperatures after a blazing hot summer (at least at night). It is also my birthday month, so there are certainly lots of dining opportunities as my friends know how much I love to celebrate with food. But perhaps the best part of September is it is the harvest time of the best chiles on the planet: New Mexico (Hatch) Green Chiles.

Don't be fooled by posers. I had heard that many of the local grocery stores in my area were selling these faux New Mexico chiles instead of the real deal. Many growers and producers claim the name "Hatch". Because of stiff competition and so many claiming to be authentic "Hatch" chiles, it is now illegal to label any green chiles as New Mexico Green Chile unless it is grown in the state of New Mexico. 

Last year for the first time, I decided to order my chiles directly from a farm in New Mexico, Diaz Farms to see if there was truly a difference. The shipping cost was no small matter, but I am here to tell you, it was totally worth the expense. There was a huge difference in the flavor of Diaz Farms chiles. This year, we heard that there was a guy in Globe, AZ who was making the drive do the farm to bring back the goods. Fred wasted no time getting up to Globe to buy our chiles. He got a little crazy and brought back something like nine - 35 pound bags of fresh chiles. The whole house smelled like piquant chiles. Fred is a generous guy and shared his bounty with a few of our good friends. We still ended up roasting 2 1/2 - 35 lb bags for ourselves. 


Here is Fred getting the roasting started in a roaster borrowed from his good friend Blue. It is super important to make sure you roast them until the skin is good and charred so the skin will come off easily. It is a true skill to make sure they are roasted long enough for the skin to come off, but not too long or the flesh will rip off with the skin.


Caution: Make sure you use rubber gloves when handling your chiles or you are likely to burn your hands and anything else you touch. When I do huge amounts, I don't always peel them before packaging and freezing. The skins come off pretty easily after freezing. 


Here is the awesome peeling crew: Jackie and Tyler. Tyler wore gloves and her hands were still burning, so make sure to take that caution note seriously. It's much more fun to roast with friends!


Even the wine glasses weren't safe from being Chilified.


We probably froze at least 80 bags of chiles! I'm excited that we won't have to ration near as much as we did last year. One of Fred's favorite ways to each his chiles is in Sweet Potato Hash. He makes it different every time, so there is no recipe to speak of, but it usually contains sweet potatoes, regular potatoes, lots of true Hatch chiles  and onions and whatever else he feels like throwing in. So there you have your "H" for today. Hatches and Hash! Hooooweeee!


Sunday, September 8, 2013

MoFo 2013 - Day 8 - G is for Garlic from Gilroy

Gilroy, CA is known as the "Garlic Capital of the World". The city is located at the southern most end of Santa Clara county. The temperate climate is fantastic for growing garlic. There are a number of city parks and a couple of larger parks to enjoy nature. It is also a great place for golf lovers. They even have a couple of wineries!

The famous Gilroy Garlic Festival is held every July. Each year the organizers challenges chefs from all over the country and Canada to create their very best garlic recipes. Only 8 recipes are chosen from the many recipes submitted. The winners are invited to the festival to cook their recipes for the crowd. The winner walks away with the crown (of garlic of course) and 5K! The winner this year Karen Harris with her Carnival Style Fish Sticks with Lemony Jalapeño and Spicy Kohlrabi Slaw. I may give veganizing her recipe a shot when I get back to my own kitchen. I'm going to make it my garlicky goal (oh another G word) to submit a recipes for next year's competition!

While I missed the festival this year, I did visit Gilroy a couple of days ago. OK, I have to confess, I am writing this intro pre-trip, just in case I get busy and can't post this while on the road. I'm very excited about enjoying Gilroy's mild temperatures and beautiful scenery while I am there. I plan on updating this post with all of the garlicky details and pictures upon my return.


Saturday, September 7, 2013

Mofo 2013 - Day 7 - F is for Freaking Awesome

F is for fun, which is what I am having coming up with ideas for this MoFo! This time I thought of perhaps doing some fritters, falafel, fricassee, frosted cupcakes, french onion soup, fresh fennel. All of which made me want to eat them. But what ended up happening is that I had some leftover rice in the fridge. I am famous for forgetting this kind of stuff in the fridge until it is stinky and garbage bound. I was super excited to save this batch of rice from the same fate.

The thing I love about cooking meals myself is that you can make things just how you like them. I love fried rice, but I often find that there is a lot of rice and not very many veggies. My version ups the veggie ratio and uses brown rice for added health benefits.


Fried Rice with Shiitakes and Broccoli

Makes 2 large portions

4 tablespoons toasted sesame oil, separated
2 large fresh shiitake mushrooms (about 1 cup when sliced)
pinch salt
1 1/2 cup small broccoli florets (about 1/2 inch size)
2 cups leftover long grain brown rice (I used basmati)
1 tablespoon low sodium tamari or soy sauce
1 teaspoon red or brown miso
1/3 cup thinly sliced green onions, green part only

In a wok or deep sauté pan, 2 tablespoons toasted sesame oil over medium low heat. Add shiitake mushrooms and sauté until they release their liquid and slightly softened, about 3-4 minutes. Add broccoli florets and sauté until they are bright green, about 3 minutes. Add a splash of water if the pan is too dry. Remove from pan and set aside in a bowl. Add remaining 2 tablespoons oil to hot pan and add rice. Saute until starts to get golden brown and slightly crunchy (just slightly). Stir in mushroom mixture, soy sauce and miso until well combined. Remove from heat and toss in green onions.

Serve immediately.

This is actually pretty darn good reheated as well!

*Can be GF if GF tamari is used.