Showing posts with label dessert. Show all posts

Sunday, March 15, 2015

How Did I Celebrate Pi Day? "Grand" Strawberry Pie

I kept hearing all the scuttle butt about Pi Day. I am not usually a big pie maker or baker, but I love when I have time to participate in any kind of food themed day. I figured I better get turning the oven on out of my system soon too. It's going to heat up here very quickly and I will not want to go anywhere near that stove when it is above 100 degrees. So Pi day was a tasty excuse to fire it up.


A Four Leaf Clover for St. Patty's Day

I was going to make one of Julie Hasson's no bake pies originally as I had a organic pre-made pie crust in the freezer. Then I found huge containers of fresh organic strawberries at Costco and the stage was set. I am kind of embarrassed to admit, but I have never made a strawberry pie. I decided I wanted to make a double crust baked version, but kept finding recipes for single crust non-baked version. So I kind of mixed ideas to come up with this lovely creation.

The "Grand" comes from the fact that I used fresh orange juice and orange zest from our tree for subtle flavoring. Years ago, I fell in love with the strawberry Grand Marnier flavor combination and thought it would be delicious in pie. Oh yeah, I was right. I brought the pie to a friend's house for dinner and it was demolished. Not a scrap left. I think this pie would be lovely with a nice Prosecco or sparkling water with a squeeze of lemon if you are not a drinker.


"Grand" Strawberry Pie

Make One 9-inch pie

2 pounds fresh strawberries, quartered if large, halved if small (about 6 cups)
1/2 cup orange juice
1/2 cup sugar
3 tablespoons arrowroot starch
1 teaspoon orange zest
1/2 teaspoon vanilla

2 raw pie crust rounds (your favorite recipe, my favorite to use is the Basic Pastry Crust from Veganomicon).

Spray coconut oil (or any other neutrally flavored oil)
Sugar for sprinkling on the top crust

Preheat oven to 400 degrees. Lightly spray 9 inch pie pan with oil.

Place 5 cups fresh strawberries in a large bowl, reserving 1 cup.

In a blender, combine 1 cup strawberries, orange juice, sugar, arrowroot, zest and vanilla until smooth. Place in a small saucepan over medium-low heat. Simmer until thickened, stirring constantly, about 3 minutes. Pour thickened mixture over fresh strawberries and stir until they are evenly coated.

Roll out one pie crust (don't forget to use flour and parchment paper to make rolling a breeze) to about 1 inch larger than the pie pan. Gently press to the bottom of pie pan. Fold edges under and pinch gently to shape edges. Spoon in Strawberry mixture. Roll out second pie crust. Using cookie cutter of your choice, cut out fun shapes and place evenly over the top of the pie. You want to cover at least 2/3 of the pie surface. As an alternative, you can make lattice. I am too impatient for that, so I cheat. Spray top pie dough with a light coating of oil. Sprinkle with a touch of additional sugar. Place in the oven and bake for 35-40 minutes until the crust is slightly browned.

Remove from oven. Let cool slightly, then refrigerate for at least three hours until completely cool before serving.

Watch it disappear!

Friday, March 14, 2014

Chia - It's Not Just for Pets Anymore!

History and Cultivation

Chia seeds were a staple in the diet of ancient Aztecs, Mayans and Indians in the Southwest of the United States. The tiny seed was so revered at one point that they were used as currency.
Chia is currently cultivated and grown in Argentina, Mexico, Peru, Bolivia and Australia.  In Australia it is a relatively new crop compared to the seed’s ancient history in other parts of the world. Even though Australia is a relative newcomer to the chia arena, it is predicted they will become the largest producer of the seed.

Superfood Characteristics

The Oxford dictionary defines a superfood as “A nutrient-rich food considered to be especially beneficial for health and well-being”. This tiny seed truly fits this definition. Chia is a Mayan word that means “strength”.  Many health conscious athletes (especially distance runners) use the mighty chia to keep hydrated and energized during workouts. The unique gel they create allows liquid to stay in the body longer.

·      The health benefits are many:
  • ·      Excellent protein source
  • ·      One of the most concentrated sources of omega – 3 essential fatty acids
  • ·      High in anti-oxidants
  • ·      High in fiber
  • ·      Excellent slow-releasing energy source
  • ·      Support healthy muscle function
  • ·      Anti-inflammatory and anti-viral properties
  • ·      Aids in hydration


Chia vs. Flax

Chia can be used in many of the same ways that flax seed is used. As opposed to flax seed, chia is much more stable. Flax seeds go rancid very quickly and must be kept refrigerated or frozen to prevent spoiling. Flax seed are higher in omega-3 fatty acids; however, they must be ground in order to get the full benefit of the nutrients in the seed. Chia does not have to be ground to reap its nutritional benefit (although some research has shown that more nutrients become available when it is ground). Clearly Chia is the winner in the convenience category.

Chia is actually higher in fiber, calcium, phosphorus and selenium than its nutty counterpart. I want to make a point here; flax is still a super food in its own right and should be included in a healthy diet plan. It is higher than Chia in magnesium, potassium, and vitamin B1 and copper. Include them both regularly for well-balanced nutrition.

Here is a side by side compairison of Chia Seed vs. Flax Seed (1 oz. serving)

Data provided by nutritionaldata.self.com
*Data Provided by Health-Alicious-Ness.com
**Data Provided by Chiatrition Chia Seeds.com

Nutrient
Chia Seeds
Flax Seeds
Calories
137
150
Fat
9 g
12 g
Saturated Fat
1 g
1 g
Dietary Fiber
11 g
8 g
Carbohydrates
12.3 g
8.1 g
Protein
4.4 g
5.1 g
Calcium
177 mg
71.4 mg
Iron
1.7 mg**
1.6 mg
Phosphorus
265 mg
180 mg
Potassium
44.8 mg
228 mg
Zinc
1 mg
1.2 mg
Manganese
0.6 mg
0.7 mg
Selenium
15.5 mcg *
7.1 mcg
Omega-3 fatty acids
4915 mg
6388 mg
Omega-6 fatty acids
1620 mg
1655 mg

Chia in Food and Recipes

With all of chia’s health benefits, it is a great idea to add it to your daily eating plan. Here are some great ways to use chia in your kitchen:

  • ·      Chia can be used as a substitute for eggs in many baked goods. To make a chia “egg” grind up 1 tablespoon of chia seeds and combine with 3 tablespoons of water. Let the mixture sit for at least 10 minutes to thicken.
  • ·      Use chia to thicken stews, soups and gravies.
  • ·      Thicken salad dressings with chia or just sprinkle seeds on top of a salad for extra crunch.
  • ·      Make your own energy gels for working out. They are far healthier than the corn syrup and chemical ridden commercial versions.
  • ·      Puddings are super easy to make with chia. There are plenty of flavor options: chocolate, vanilla and fruit to name a few. Below is a recipe I created with the fresh oranges from my tree.


Orange Dream Chia Pudding

Makes 4 servings

1 can light coconut milk
1/3 cup raw cashews
2 large oranges, peeled and cut into quarters
¼ cup white chia seeds
2 tablespoons organic coconut sugar
1 teaspoon vanilla extract


Combine all ingredients in high-speed blender until smooth. Taste for sweetness. If a sweeter pudding is desired, add another tablespoon of the organic coconut sugar. Pour into serving bowls and chill for at least one hour. Top with chopped fresh fruit and/or nuts as optional garnishes.

Tuesday, September 10, 2013

MoFo 2013 - Day 10 - I - Scream You Scream

You got it. I is for ice cream! Who doesn't love a sweet creamy bowl of rich, delicious ice cream. The first ice cream parlor in America was opened in 1776, which just happens to coincide with the birth of our nation. Seriously, it is Americana in a bowl. I'm sure most of you have some great childhood memory that involves getting all sticky from your favorite frozen treat. My personal favorites growing up were good old chocolate chip and orange sherbet. I still love the simpler flavors, but my palate has matured and I like to try some unusual flavors as well.

I've tried a few different commercial brands with mixed results, so I am experimenting with making my own. I like the idea of controlling how much and what type of sweeteners I use Fred is more the ice cream eater than I am, so he is going to be the final judge of my efforts. I do have Hannah Kaminsky's Vegan A La Mode, but the last two times I went to make something from it, I've been missing important ingredients for the ones I wanted to make. There are some exciting flavors in that book that I am excited to try like White Russian Ice Cream, Banana Pudding Ice Cream, Mouse Tracks Ice Cream to name a few.

But this time around, I decided to create my own. I'm a little pre-mature, but I am starting to dream about fall and winter flavors. The holidays will be here before we know it. Put away your rolling pin. This creation is like a frozen version of pumpkin pie without the crust.


Pumpkin Pie Ice Cream with Toasted Walnuts and Pecans

Makes a generous quart

2 cups soy creamer, separated
1 - 15 oz can organic pumpkin puree (not pumpkin pie filling)
1 1/2 tablespoons arrowroot
1/4 cup maple syrup
1/2 cup dark brown sugar*
1 teaspoon vanilla
1 teaspoon cinnamon
pinch nutmeg
1/2 cup chopped walnuts, toasted
1/2 cup chopped pecans, toasted

In a small bowl mix arrowroot and 1/4 cup soy creamer and set aside. In a heavy bottomed saucepan whisk together remaining soy creamer, pumpkin puree, maple syrup, dark brown sugar, vanilla, cinnamon and nutmeg. Turn heat to medium-low and cook until mixture just starts to boil, stirring frequently to prevent scorching. Remove from heat and whisk in arrowroot mixture. Whisk for 3-4 minute until mixture thickens slightly. Place in refrigerator and make sure to chill for a few hours until mixture is COLD. Churn the ice cream in your ice cream maker according to the manufacturers directions. About 1 minute before it finished, pour in chopped nuts. Let go one more minute to combine. Place ice cream in airtight sealed container and freeze for at least 4 hours.


Sunday, January 1, 2012

Happy 2012!!!

We had yet another incredible New Year's Eve feast. Several years ago a friend of mine invited us to be part of a 4 course wine pairing dinner. Back then Fred and I were still eating meat. As a matter of fact it was at one of these dinners that we had or very last meal with meat.

We loved the tradition so much, we decided to carry on with a vegan version. We found that a few of our friends were up for joining us in the vegan version, which just thrilled me! This year my good friends Beth and Jerry were our fantastic hosts. I love these two for many reasons. One of those reasons is that they love to create in the kitchen as much as I do. It makes our dinner party celebrations even more awesome. This year they decided on an Italian themed dinner.

The next couple of days I will be posting about our adventures course by course. I am going to do it in reverse for no other reason than I took a long time to write up my dessert recipe in my wine induced day after fog.

I must start off by saying, desserts and pastries are still my Archilles heal. It is always a challenge for me to come up with something worth serving to others on my own, at least without  having to try and try again. My original plan was to make white chocolate mousse stuffed cannolis using the white chocolate mousse recipe from The Artful Vegan. The mousse was an epic fail. It was completely liquid after sitting in the fridge all night. It was a really sad and expensive fail. But the show must go on.

To keep with the Italian theme I then thought that something with "marscapone" would be a good idea. I didn't want to do tiramisu, because I felt that would be too obvious. So I started playing around with the marscapone idea first. I had some egg nog in the fridge that I had bought for Christmas and never used and the Egg Nog Marcapone Cream was born.

We had a white elephant exchange a couple of night ago and I walked away with some yummy fig balsamic vinegar from Queen Creek Olive Mill. As soon as I got this I knew I had to use it somehow for this dinner.


After the syrup was made, I was having a hard time deciding on the poaching liquid. I wanted to make sure there weren't too many opposing flavors going on. I ran to our local AJ's food market and talked to Chris their wine and spirits expert. He immediately took me to where there was a lovely pear liquor. It was pricey, but I had to have it. I was toying with the idea of using a sweet marsala, which I think would work well here for a lot less dinero. The reason I steered away from that this time was the wine Fred had chosen for the original pairing: a lovely Pirovano Extra Dry Prosecco. The wine expert at Whole Foods said this one is vegan.

While this was not easy on the wallet, it was very lovely on the plate and the palette. We were about 5 bottles in by this time so I must apologize that I didn't get a super close up. I chose to cut the puff pastry into a square for the bottom layer and a fun star for the top.

Happy 2012 my friends! May it be a prosperous, joyful and delicious year for you!


Poached Pear Napoleon with Eggnog Marscapone Cream and Fig Balsamic Drizzle

Makes 6 Serving

There are several components to this dish and it may look a bit overwhelming. None are too complicated and several can be done in advance. I recommend making the marcapone cream, toasted walnuts and the balsamic syrup a day ahead of time to make assembly a snap.

Eggnog Marscapone Cream

1/2 cup tofutti cream cheese
1/2 cup tofutti sour cream
1/2 cup Earth Balance Egg Nog
1/3 cup sugar
1 teaspoon vanilla

Poached Pears

4 ripe but firm anjou pears (peeled, cored and halved)
1 bottle Mathilde Poire Liqueur, (or other pear liqueur) 3 tablespoons separated out
1 whole vanilla bean scrapped
1/2 teaspoon ground cinnamon
1/8 teaspoon nutmeg
2 tablespoons light brown sugar

Fig Balsamic Syrup

1 bottle Queen Creek Fig Balsamic Vinegar
1/4 cup agave nectar
2 tablespoons sugar

Toasted Walnuts

1/4 cup walnuts, coarsely chopped
1/4 teaspoon cinnamon
1 teaspoon sugar
touch of salt
2 teaspoons canola oil

1 package frozen puff pastry, thawed

For the Eggnog Marscapone Cream:

In medium sized bowl combine the cream cheese through vanilla. Refrigerate for at least an hour. Combine until mixture is fairly smooth. This can be made a day ahead of time and refrigerated in a sealed container. If mixture is too loose add a bit more cream cheese. If it is too thick add a bit more eggnog.

For the poached pears:

In a small bowl whisk together 3 tablespoons pear liqueur, vanilla beans, cinnamon and nutmeg until sugar is dissolved. In a large saute pan (large enough to hold all of the pears in one layer) over medium-low heat stir remaining liqueur with sugar mixtures. Place pears cut side down in pan. Cover and poach for 30-40 minutes (depending on the ripeness of the pears) turning 1/2 way through. Let pears cool enough to handle them and slice to about 1/4" thick. Then let them cool to room temperature.

For the Fig Balsamic Syrup:

While the pears are poaching, combine syrup ingredients in small saucepan. Simmer over medium low heat until the liquid is reduced by 1/2, about 20 minutes. Be careful not to let it boil or you will have a sticky icky mess. When the pears are through poaching. Add 1/2 cup of the poaching liquid to the syrup and stir to combine. Let the syrup and the pears cool to room temperature.

Carefully lay out the puff pastry sheet(s). Using your choice shape of cookie or biscuit cutter (approx 3" size) cut out 12 pieces of puff pastry. Place on ungreased cookie sheet about 1 inch apart. Bake according to package directions (usually 10-12 minutes in a 400 degree oven). Let cool to room temperature.

For the toasted walnuts:

In an 8 x 8 baking dish (or similar size) combine walnuts through oil until evenly coated. Bake in a 350 degree oven for about 4-5 minutes, until lightly toasted. Let cool to room temperature. Can be made ahead of time and stored in an airtight container for 1-2 weeks.

To assemble:

Place about 1 tablespoon marscapone cream on middle of serving plate. Place one piece of cooked puff pastry on top. Next add about 6-8 slices of the poached pears another tablespoon or two of marscapone cream (this stuff is like crack so use as much as you want within reason). Place a second puff pastry piece next. Dollop with a little more marscapone cream. Drizzle decoratively with syrup and garnish with cinnamon toasted walnuts.

Listen to the oooohs and aaaahs of your guests.

Wednesday, March 17, 2010

Guess Who's Testing Again

Yep. I said I would stop testing for a while. Ha! That didn't last long. I love testing and being part of the process of helping make amazing books come to the shelf. I can't help myself.

Right now I am testing for three people...one who prefers to remain obscure and annonymous. The two other I'm hoping will offset each other. One is for Isa Chandra Moscowicz's upcoming Appetite for Reduction (I hope they keep that name - Love ya Axel), a low fat book. The other has yet to be named and it is a baking book by Carla Kelley. Both gals' recipes are amazingly good. I'll post a couple of teasers for you today.

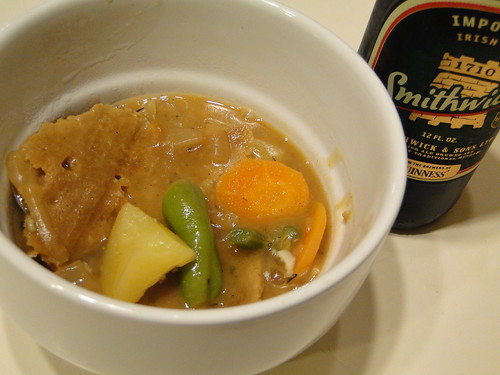
It is St. Patrick's Day, so being the good Irish girl that I am, I must post this fantastic Irish Stew. It is not only delicious and bursting with homey, flavorful goodness, it boasts only 330 calories for a big hearty serving. It is low fat too. Bonus. I'm sure the green beer will offset any calorie savings, but hey, it's all about balance, right? (Please ignore the Smithwicks in the picture...I just found out it is not vegan...boo!)


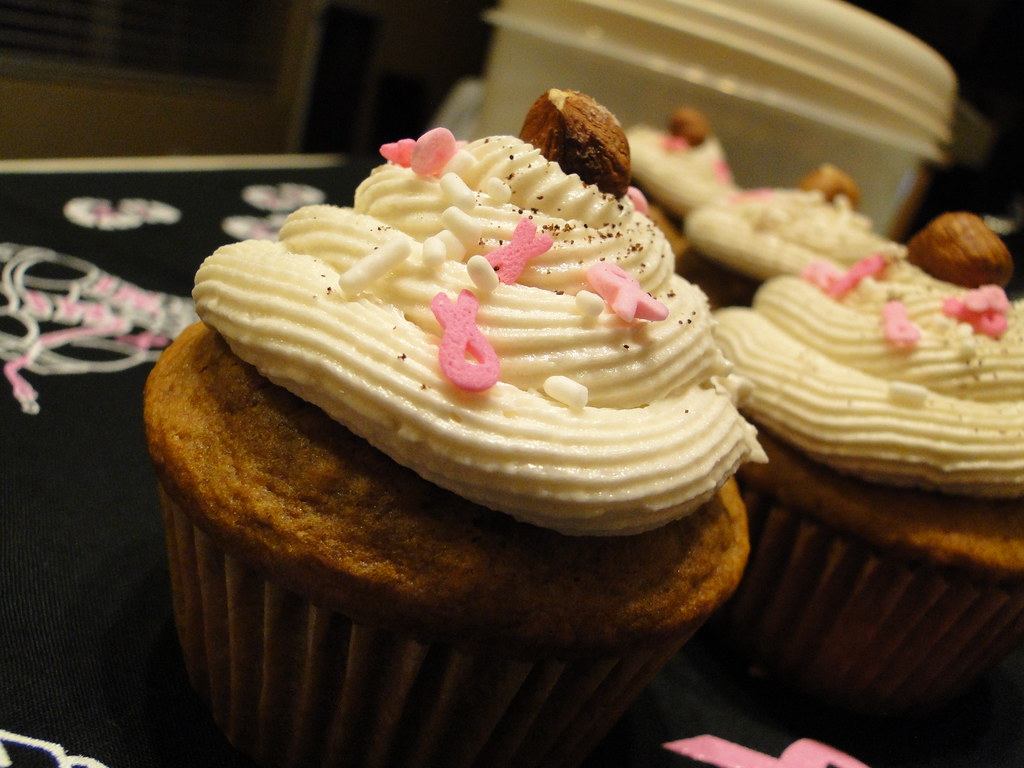
Next comes a very fun and festive cupcake from the fabulous Carla (who you PPK folks know better as QueenV). These are a little bit on the pricey side due to the hazelnuts, but so worth it if you are a fan of them. I made these for a bake sale to benefit the Breast Cancer Fund, so the pink ribbon sprinkles were the perfect touch. I will be making these again! They are a decadent treat and are sure to impress your guests, friends, and family.

Hazelnut Latte Cupcakes


Our waistlines may not be excited about the testing, but I am. It is my way to unwind and have fun. It gives me excuses to cook, invite people over to taste test and spend some quality time in the kitchen. So you local peeps, don't be surprised if you get a desperate call from me to help eat the goods!


Friday, February 12, 2010

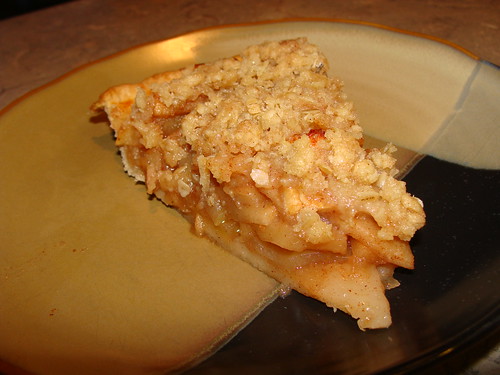
Kimmy's Dutch Apple Pie

There are those days where you just want some comfort foody goodness. To me, the smell of an apple pie baking brings back cozy fond memories of my grandma. I have to admit, fruit pies were not my thing as a kid, but Grandma's apple pie was the exception. She was truly a master of pie crust. It was crispy on top, perfectly flaky and crusted with sugar. I'm certain it was chock full of shortening of the non-vegan kind.

Sometimes a cook is in no mood to do a double crust on a pie. This is a great alternative when you aren't feeling the crust love. The pie is easy peasy with only a bottom crust. You can take the super easy way out and buy a pre-made vegan crust, but I prefer to make it from scratch. My favorite recipe is from Isa's Veganomicon. This is one crust recipe that consistently give excellent results. You just have to make sure your ingredients are very cold! The crumbly top on this is so yummy and far easier than making that second crust.

I like to use a variety of apples to give a good variety of textures and flavors. The mixture of tart and sweet apples and the sprinkling of cinnamon and nutmeg give this pie it's homey appeal.

Kimmy's Dutch Apple Pie


1 single 9" pie crust (not baked)

Pie Filling:

1 tablespoon lemon juice
2 large pink lady apples
2 large fuji apples
2 large granny smith apples
2 large gala apples
2 teaspoons cinnamon
1/8 teaspoon nutmeg

Crumble Topping

1/2 cup whole wheat pastry flour
1/4 cup quick cooking oats
1/3 cup Earth balance
1/2 teaspoon cinnamon

Preheat oven to 450.

If you are making your pie crust, make the dough well ahead of time so it can chill in the fridge. Roll out crust and put into a 9" pie pan.

Make the crumble topping before peeling your apples. Mix flour, oats and cinnamon until evenly distributed. Cut in Earth balance until mixture resembles a very corse meal. Set aside.

Place lemon juice in large bowl. Core, peel, and thinly slice the apples. As you are slicing the apples toss them into the lemon juice to prevent them from browning. Once you have all of the apples sliced, toss in the sugar, cinnamon and nutmeg. Pour mixture into prepared pie crust.  Bake at 450 for 15 minutes.

Pull pie out of the oven. Sprinkle topping in and even layer over pie, making sure it is covered. Lower oven temperature to 350 degrees and bake for 35-45 minutes until the filling starts to bubble.


Thursday, October 29, 2009

Vegan MOFO - Day 29 - Zucchini Brownies

My friend Dana (no relation to the brownie author)- from the Day 28 post - has been asking for this recipe for months. Her kids went wild for it. I found a non-vegan version of this recipe years ago (back in 2000) on an oddball site. I have to give credit for the original recipe to Dana Resop. I cannot find the original recipe online anymore. I thought I had lost it in the great recipe binder abyss. I'm thrilled that I not only found the original, but I had actually made notes on how I veganized it! This is a rich, moist delicious brownie that will win you brownie points (pun intended) with your friends and family.


Dana's Zucchini Brownies


1 1/2 cups sugar
1/2 cup Earth Balance vegan butter
1/2 cup silken tofu
1 tablespoon applesauce
2 tablespoon non-dairy milk (soy, almond, etc)
1 teaspoon vanilla
2 1/2 cups zucchini, grated
2 cups flour
1/4 cup cocoa
1 teaspoon baking soda
1/2 teaspoon salt
1/2 teaspoon cinnamon
1 cup chocolate chips
1/4 cup sugar

Preheat oven to 350.

Cream sugar and butter together. Add tofu, applesauce, and non-diary milk and mix well. Mix flour cocoa, baking soda, salt and cinnamon together in a seperate bowl. Stir into wet ingredients. Fold in zucchini and mix well. Pour better into well oiled 9 x 13 pan. Sprinkle top with chocolate chips and remaining 1/4 cup sugar. Bake for 30 minutes. Test with toothpick for doneness.

Friday, November 28, 2008

Happy Thanksgiving


I hope everyone had a wonderful Thanksgiving. There are so many things to be thankful for. My list is long. While I did have to work this holiday, I still took a lot of time in the kitchen this week. Sadly, I wasn't as good with the camera as I usually am.

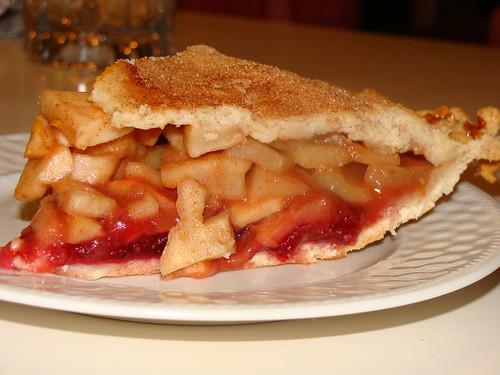
I did however, get a fantastic picture of a pie I am particularly proud of. I found this recipe on Epicurious back in 2004 or so. It was love at first bite, really. It is called the Cranberry Apple Ribbon Pie. It was very easy to veganize. I used the Basic Pastry Crust for Veganomicon. This is a wonderful crust for fruit pies. The bottom of the pie has a layer (or ribbon) of home made cranberry sauce. It is then filled with tart/sweet apples tossed with lots of cinnamon. I used a combination of Fujis and Granny Smiths. The top was sprinkled with cinnamon sugar. I'm not usually a huge pie fan, but I have to confess, I ate two pieces of this one yesterday.

Saturday, October 11, 2008

Vegan MOFO Day 11 - Iron Chef - Pears and Nuts


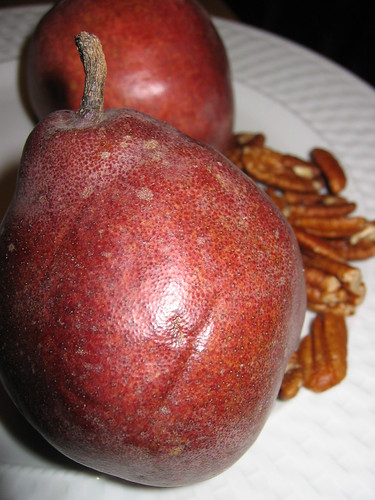
I missed yesterday due to travel once again. I am hoping to make up for lost time this weekend. To this end I bring you my contribution to this week's iron chef challenge. This week's ingredients were pears and any type of nuts. Apparently as a hypothyroid sufferer, I am supposed to avoid pears. I don't eat them very often, so I figured why not throw caution to the wind. I found some lovely local organic red bartlett pears at Whole Paycheck. They were so sweet and juicy, it was hard not to eat the plain, but I had a mission.

My original idea was to do something in puff pastry, but I didn't want to wait for it to thaw. Then I thought about taking the super easy route and making a smoothie. Suddenly this adventurous spirit came over me and I decided to do something I had never done before; create my own cheezecake recipe. Honestly I was concerned about screwing up something with lots of expensive ingredients, but what the hell, isn't that what being iron is all about anyway?

I bring you my very first original cheezecake style recipe.

Pear Maple Cheezecake with Toasted Pecan Oat Crust


For Crust

1 C chopped pecan pieces, toasted
1 C quick cooking oats
1 Tablespoon granulated cane sugar
1 teaspoon vanilla
1/4 cup Earth balance, melted

In food processor put pecans, oats, and sugar. Process until it resembles a meal. Drizzle melted Earth balance and vanilla over the mixture and blend with a fork.

For Filling

12 oz. package extra-firm silken tofu (preferably organic)
1 8 oz. containter non-hydrogenated toffutti cream cheese
2 Tablespoons light coconut milk
1 Tablespoon cornstarch
2 Tablespoons brandy
2/3 cup maple syrup
1 Tablespoon dark molasses
1 teaspoon vanilla
1/4 teaspoon cardamom
1/4 teaspoon nutmeg
pinch allspice

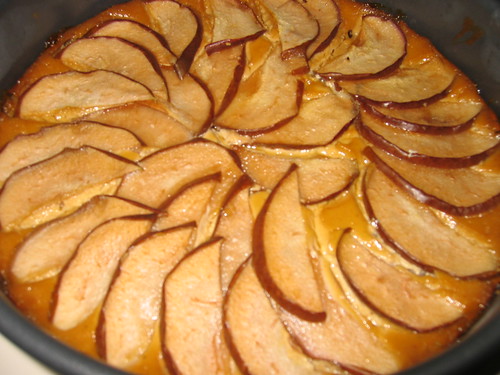
Preheat oven to 350. In food processor, crumble tofu. Add cream cheese and blend until smooth. Make a slurry with coconut milk and cornstarch. Add the slurry and the remaining ingredients and blend until smooth. Make sure to scrape sides a couple of times. Let mixture sit for 10 minutes. In the meantime, lighty oil a 9" springform pan. Press crust mixture on bottom. Pour filling on top of crust. Slice unpeeled pears in uniform thin slices. Arrange in a circle, slightly overlapping, starting from the center and working your way out to the edge of the pan. Bake at 350 for 30 minutes. After 30 minutes reduce heat to 325 and bake for 30 more minutes until cake only wiggles slightly. Cool to room temperature on a rack then refrigerate for 8 hours or overnight.

I haven't cut into it yet, so I am not sure how the recipe turned out. I wanted to type it up before I forgot how I made it. I will post a follow up here tomorrow when we cut into it. The filling pre-baking was really good. I have high hopes for this one!

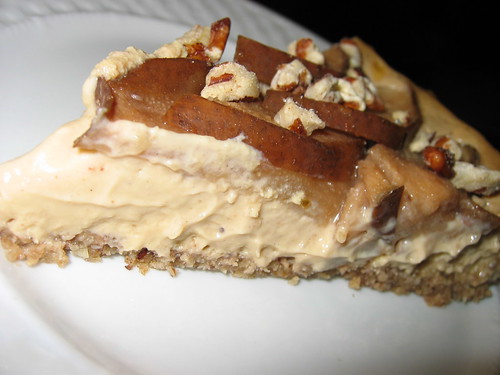
The results are in. This is a wonderful fall treat. The crust is my favorite part. It is wheat free too! The maple, pecan, pear combination is really good. The texture came out very creamy and rich. I may add a bit more cornstarch to give it a slightly more firm texture, but it really is quite tasty as is. If you try the recipe, let me know how yours came out.

Tuesday, October 7, 2008

Vegan MOFO Day 6 - Vegan Sweets

Who do you know that would turn down a decadent dessert?

As many a good vegan will tell you, the best way to break in omnis to vegan food is by baking. It is hard for anyone to resist sweet treats. Vegan baked goods are a virtual portal to all that is fantastic in vegan cooking.

I was raised in the meat and potatoes midwest. Veganism was rarely heard of in my youth. As an adult I work in an industry that is predominantly male. As I listen to my co-workers, I find that not only are they meat eaters, many are hunters and fishers. To me this is a challenge to find ways to de-mystify and glorify eating without flesh and animal products. Several of the boyz make fun of my choices. I'm certain this is their defense mechanism. So what do I do? At every turn, I slowly win them over with vegan baked goodies.

My latest temptation came in the form of a rich dark chocolate cake brushed with Frangelico with Fluffy Vanilla Buttercream (both recipes from Vegan Cupcakes Take Over the World). It didn't hurt to have beautiful, bright flowers adorning the cake.


Speaking of VCTOTW, cupcakes are taking over my bake sales. I often hold bake sales to raise funds for the Breast Cancer Fund and the Wellness Community of Central Arizona. Cupcakes are a great way to express your creativity while making so many taste buds dance with glee. Cupcakes are a fun treat for young and old. You can get everyone in on the decorating for a fun afternoon project. Kids will have a blast personalizing their very own mini cakes. The flavoring options are endless. Below are a couple of examples of fun flavors and designs we made for our bake sales.

Valentine Vanilla


Peanut Butter Chocolate


Mint Chocolate


We must not forget many of the other decadent goodies; vegan cookies, muffins, scones, custards, parfaits, bundt cakes, etc. Vegan sweets are possibly the easiest and best way to dispell the myth that eating vegan is tasteless, boring, and a sacrafice.

Cheers to vegan sweets!!