Showing posts with label gluten free. Show all posts

Friday, March 14, 2014

Chia - It's Not Just for Pets Anymore!

History and Cultivation

Chia seeds were a staple in the diet of ancient Aztecs, Mayans and Indians in the Southwest of the United States. The tiny seed was so revered at one point that they were used as currency.
Chia is currently cultivated and grown in Argentina, Mexico, Peru, Bolivia and Australia.  In Australia it is a relatively new crop compared to the seed’s ancient history in other parts of the world. Even though Australia is a relative newcomer to the chia arena, it is predicted they will become the largest producer of the seed.

Superfood Characteristics

The Oxford dictionary defines a superfood as “A nutrient-rich food considered to be especially beneficial for health and well-being”. This tiny seed truly fits this definition. Chia is a Mayan word that means “strength”.  Many health conscious athletes (especially distance runners) use the mighty chia to keep hydrated and energized during workouts. The unique gel they create allows liquid to stay in the body longer.

·      The health benefits are many:
  • ·      Excellent protein source
  • ·      One of the most concentrated sources of omega – 3 essential fatty acids
  • ·      High in anti-oxidants
  • ·      High in fiber
  • ·      Excellent slow-releasing energy source
  • ·      Support healthy muscle function
  • ·      Anti-inflammatory and anti-viral properties
  • ·      Aids in hydration


Chia vs. Flax

Chia can be used in many of the same ways that flax seed is used. As opposed to flax seed, chia is much more stable. Flax seeds go rancid very quickly and must be kept refrigerated or frozen to prevent spoiling. Flax seed are higher in omega-3 fatty acids; however, they must be ground in order to get the full benefit of the nutrients in the seed. Chia does not have to be ground to reap its nutritional benefit (although some research has shown that more nutrients become available when it is ground). Clearly Chia is the winner in the convenience category.

Chia is actually higher in fiber, calcium, phosphorus and selenium than its nutty counterpart. I want to make a point here; flax is still a super food in its own right and should be included in a healthy diet plan. It is higher than Chia in magnesium, potassium, and vitamin B1 and copper. Include them both regularly for well-balanced nutrition.

Here is a side by side compairison of Chia Seed vs. Flax Seed (1 oz. serving)

Data provided by nutritionaldata.self.com
*Data Provided by Health-Alicious-Ness.com
**Data Provided by Chiatrition Chia Seeds.com

Nutrient
Chia Seeds
Flax Seeds
Calories
137
150
Fat
9 g
12 g
Saturated Fat
1 g
1 g
Dietary Fiber
11 g
8 g
Carbohydrates
12.3 g
8.1 g
Protein
4.4 g
5.1 g
Calcium
177 mg
71.4 mg
Iron
1.7 mg**
1.6 mg
Phosphorus
265 mg
180 mg
Potassium
44.8 mg
228 mg
Zinc
1 mg
1.2 mg
Manganese
0.6 mg
0.7 mg
Selenium
15.5 mcg *
7.1 mcg
Omega-3 fatty acids
4915 mg
6388 mg
Omega-6 fatty acids
1620 mg
1655 mg

Chia in Food and Recipes

With all of chia’s health benefits, it is a great idea to add it to your daily eating plan. Here are some great ways to use chia in your kitchen:

  • ·      Chia can be used as a substitute for eggs in many baked goods. To make a chia “egg” grind up 1 tablespoon of chia seeds and combine with 3 tablespoons of water. Let the mixture sit for at least 10 minutes to thicken.
  • ·      Use chia to thicken stews, soups and gravies.
  • ·      Thicken salad dressings with chia or just sprinkle seeds on top of a salad for extra crunch.
  • ·      Make your own energy gels for working out. They are far healthier than the corn syrup and chemical ridden commercial versions.
  • ·      Puddings are super easy to make with chia. There are plenty of flavor options: chocolate, vanilla and fruit to name a few. Below is a recipe I created with the fresh oranges from my tree.


Orange Dream Chia Pudding

Makes 4 servings

1 can light coconut milk
1/3 cup raw cashews
2 large oranges, peeled and cut into quarters
¼ cup white chia seeds
2 tablespoons organic coconut sugar
1 teaspoon vanilla extract


Combine all ingredients in high-speed blender until smooth. Taste for sweetness. If a sweeter pudding is desired, add another tablespoon of the organic coconut sugar. Pour into serving bowls and chill for at least one hour. Top with chopped fresh fruit and/or nuts as optional garnishes.

Saturday, March 8, 2014

Spain Memories - Pimientas del Padron

When I visited Spain a couple of years back, I was lucky enough to have hosts that let me play in their kitchen. Not only did I get to play in the kitchen, I had the honor of having my friend Nena share a couple of her family recipes. Such great memories of the day we hung out and cooked together.

Spain has these incredible chilies that are about the same size as a big jalapeño, but are shaped a little bit differently. They are called Pimientas del Padron from La Caruna in northwestern Spain. These peppers are typically pretty mild, but every so often, you may get one that is realllllly hot. My dear friend got one of these crazy hot ones on our last trip to Spain. I like to call it "Pepper Roulette". It's a very delicious gamble.


I had never seen these pepper stateside before. Last week I found them at Whole Foods. I was over the moon! I just couldn't believe it. I snapped up a big bag of them. The traditional preparation for them (as taught to me by the fabulous Nena) is quite simple. A healthy portion of olive oil is heated to a high temperature (but do not let it smoke!). Pour the peppers in the pan and cover with a lid. Let them sauté for about 5-7 minutes, the peppers should be nice and browned. Shake pan to turn peppers. Saute for another 5-7 minutes. Drain on paper towels. Salt with coarse sea salt. Let them cool for a couple of minutes so as not to burn your mouth with the temperature cuz you may burn it with the heat if you get one of those fiery babies!


They are a rare find, so if you see them, make sure to get your hands on them!

Saturday, September 28, 2013

MoFo 2013 - Day 28 - Za'atar Seasoning

Z is for Zucchini and Za'atar

Zucchini is one of my favorite Z words. When I visit my family back in Illinois in the summer, my brother's garden is usually brimming with crazy amounts of zucchini. We've finally had success growing it here in AZ too. It is a very mild, so you can use it in so many dishes.

I wanted to combine it something unique: Za'atar, an exotic spice from the Middle East. It is hard to describe the flavors. The sumac is bright and almost citrus like in flavor, but not quite. I knew I had purchased some for some recipe I wanted to make, but I had no idea where it was stashed. After a crazy pantry search I found it! Toasted sesame seeds are a must. There is debate on the green spices: thyme, marjoram and oregano. I decided to use both thyme and oregano in my mixture.

I found a lot of different recipes for Za'atar and it is true that the spice mixtures are different depending on what part of the region the mixture comes from. Forgive me if I have bastardized any tradition, but this is my take on Za'atar. You can easily double this recipe.

Za'atar Spice Mixture

1 tablespoon toasted sesame seeds
1/4 teaspoon cumin seeds
2 tablespoons sumac
1 1/2 tablespoons dried thyme
1/2 teaspoon salt
1/4 teaspoon oregano

Lightly crush sesame seeds and cumin seeds to release their flavors. Mix all ingredients together and store in an airtight container for up to 2 weeks.

I wanted to marry the mild zucchini with the aromatic Za'atar. Recently, I had gone to a local restaurant and had some amazing zucchini chips. I thought the chips and the seasoning would be a great combo. So for the first time, I attempted frying in coconut oil. Check out this weird foaming action.


Sadly the chips came out very greasy. I have ideas on how to remedy this situation in the future. I think they need to be dried before they are fried. But this fine evening I could not give up on my Za'tar and zucchini marriage dream.


So I went on to take some very thin slices of zuchs and bake them with a little Za'atar sprinkled on them. Better, but still not what I wanted.


Third attempt was the best. I again took thinly sliced zucchini. This time I stirred it up with some white wine vinegar, olive oil, garlic, Za'atar and fresh chopped jalapeño. I'm going to have to get back to you on the measurements. Recipes allude me after a couple of glasses of wine. I just start throwing shizzle together and don't pay attention. This was good enough to measure and write up. So after I get some sleep and chill out a little. I will make another batch and post the amounts here. In the mean time, here is a picture of the "pickled" yum.


Z is the end of the alphabet, but certainly no the end of MoFo for this year. 

Oh, don't think I forgot about the giveaway! The winner of the Upton's Naturals giveaway is...

#2 Cadry!!! Congrats! I will be contacting you to send the vouchers. I can't wait to see what you are going to do with those awesome Upton's goodies!!!


Saturday, September 21, 2013

MoFo 2013 - Day 21 - S is for Spinach Scramble

No plant based diet would be complete without the scramble. This is a great way to introduce friends to tofu. In this role, tofu is very unassuming. I can hardly tell the difference between scrambled tofu and scrambled eggs.

Scrambles are fun too! Like bowls, you can make any themed scramble you choose. They are a great way to use up leftovers in the fridge too. Turmeric is used to give scrambles that sunny yellow color people associate with scrambled eggs and adds some great health benefits as well. Another great thing about scrambles is they are fantastic to roll up in a tortilla for breakfast on the go.  They have no cholesterol. If you are gluten-free, use a gluten free soy sauce and you are set to go!

I like to get all of my ingredients prepped and ready to go before I start cooking as the process goes pretty fast.


Spinach Scramble

Makes 4 Servings

2 teaspoons olive oil
4 oz. cremini mushrooms, sliced thinly
1/2 orange or red bell pepper, medium dice
1 clove garlic, minced
2 teaspoons low sodium tamari or soy sauce*
1/2 teaspoon turmeric
1/4 teaspoon thyme
1/4 teaspoon black pepper
1/4 teaspoon salt
1/2 teaspoon herbs de Province
1 - 12 oz package extra firm tofu with water gently squeezed out, crumbled
1 tablespoon nutritional yeast
1 1/2 cups chopped fresh spinach

Heat a 12-inch iron or non-stick skillet over medium heat. Add olive oil, mushrooms and bell pepper. Saute until mushrooms start to soften and release some of their liquid, about 3-5 minutes. Add garlic and saute for about 30 more seconds. Pour in tamari and saute for about a minute until all of the liquid is gone, about 1 minutes. Add turmeric, thyme. black pepper, salt and Herbs de Province and saute until herbs are just fragrant, about 30 seconds. Add crumbled tofu and nutritional yeast. Saute until tofu is heated through, about 3 minutes. toss in chopped spinach and saute until spinach is just wilted, about 2 minutes.

Garnish with chopped chives and grated vegan cheese (optional).

* If you use regular instead of low-sodium, cut back on the amount of salt.

Use GF tamari and this recipe is GF!!!


Thursday, September 19, 2013

MoFo 2013 - Day 19 - R is for Raw

I'm not going to go into great detail on raw today. I recently did two posts on Raw and Raw author Judita Wignall in THIS post and THIS post. I do want to say that when I am eating raw, it's been easy, tasty and makes me feel very energetic. You don't have to have a crazy amount of special equipment to do some raw stuff. A food processor, a good blender, a good knife, cutting board and you are ready to get started.

I haven't done a giveaway all MoFo, so I think it's about time. I have another Judita Wignall book to share: Raw and Simple. In this volume, Judita offers more tips on the benefits of the raw diet, how to get yourself set up in the kitchen and great recipes.

I decided to try out Her Meat and Cheese Pierogies (pg. 132). It has several components, most of which can be made ahead of time. I made the "meat filling" the "cheese filling" and Creme Faiche ahead of time. When I got home later in the day, all I had to do was thinly slice turnips for the wrappers and cut up some chives for garnish. Honestly, I thought the creme fraiche was an unnecessary addition. I actually thought the balance of flavors was better without it.


This book, like her first one is full of beautiful pictures. She offers very handy nutritional advice. What I love about this book is that the recipes are truly simple. It makes raw less scary for those who feel a little intimidated about how to get started. 

Now it's your turn. Leave a comment about what intimidates you about raw "cooking" by midnight MST Sunday, September 19th for your chance to win a copy of Raw & Simple! Good News!! US, UK and Canadian folks are all eligible to win. The winner will be randomly selected on Monday. Please make sure to leave a way to contact you if you are the lucky winner. Good Luck!!!

Sunday, September 15, 2013

MoFo 2013 - Day 15 - Nutty for the Letter N

We're half way there folks. Day 15! I went a little nuts today. Pun intended. Nuts are so versatile it was hard to keep this post within reason. I'm going to post the cliff notes version. Nuts are packed full of quick and easy nutrition. They have protein, omega-3's, minerals, anti-oxidants and healthy fats. They are pretty high in fat, so use them sparingly in your well balanced diet.

The great thing about nuts is they can be eaten so many different ways. Simple can be best, especially when you are in a hurry. Grab a hand full of nuts for a healthy snack. They are often available out of the shell for convenience. Grocery stores with good bulk departments will offer raw, roasted and flavored varieties. When using nuts in raw recipes, it is best to soak them first. Spread nut butters on bread or veggies for a quick snack. PB & J's are pretty darn healthy if you chose those without a lot of added sugar. Nuts can be added to savor and sweet dishes. They make great garnishes too!

Here is just a sampling of the many nuts to enjoy. Starting from top left (going clockwise): cashews, walnuts, pine nuts (piñon nuts), almonds, macadamia nuts, hazelnuts, pecans (center).


I have been buying commercially made almond mild for a long time. Most of the brands I have been able to find contain carageenan. There are certain forms of carageenan that are suspected carcinogens, so I try to stay away from products that contain this ingredient as I am not sure which type might be in the product. I love almond milk and use it a lot in baked goods and on my cereal. While it may not be less expensive, making your own is a snap and you will know exactly what went into it.


First, soak one cup in filtered water overnight. Rinse and drain the almonds and throw them in the blender with 4 cups of filtered water and 1/2 pitted date (you can use a whole one if you like your milk a bit sweeter). Blend until well combined and no large chunks remain.

Take a nut-milk bag (this is an inexpensive nylon bag you can find at many health food stores and Whole Foods) and place it over a large bowl or pitcher. Pour mixture into bag letting it drain into bowl.


Gently squeeze the contents of the nut-milk bag until no more liquid comes out. You can dry the solid remains and grind into powder to use in baked goods. You should get a little more than one quart. I drink a little then store the rest in a tightly sealed quart Ball jar in the fridge.


Today I had to head to work after making my almond milk. I am fortunate enough to have a little kitchen in my office. My old Vitamix is there so I can whip up healthy smoothies and soups right there at work. Today I had the pleasure of using my freshly made almond milk. This quick smoothie is full of the goods: lots of protein from the hemp seed and almond milk, potassium from the banana, vitamins, minerals and antioxidants all around.


Banana-rama Smoothie

Makes 1 - 2 cup smoothie

1 cup fresh almond milk (or your favorite)
1 large banana (frozen is best)
1 tablespoon cacao nibs
1/2 teaspoon cinnamon
1/2 vanilla bean, scraped or 1 teaspoon vanilla extract
1 tablespoon hemp seed
1/2 teaspoon maca (optional)
1/2 cup ice

Place all ingredients in blender. Pulse to combine ingredients, then blend until smooth. Pour and enjoy.

It's really easy to snack healthy. Make this smoothie in the morning or the night before for a great snack for work or school. 


Thursday, September 12, 2013

Mofo 2013 - Day 12 - K is for Kick-Booty Kale Wraps with Kalamata Olives

K is for Kale. Some dub kale the new red meat, which might be a slight exaggeration. But kale is seriously good for you and packs a lot of nutrition in those beautiful emerald leaves. 1 cup of chopped kale contains a whopping 133% of the RDA of Vitamin A and 134% of Vitamin C. Amazingly it also contains 2.9 grams of protein. You get all of this for only 33 calories!!! OK maybe it isn't an exaggeration. This stuff rocks. I love to eat it raw in massaged kale salads. It's awesome to throw in soups. Oh and if you saute it with a little sesame oil, garlic, ginger and tamari, sprinkle with a little bit of raw sesame seeds you have an easy crazy healthy side dish.

Below are two varieties. The bunch on the left is regular green kale (red kale looks about the same with red ends). To the right is Dinosaur or Lacinto kale. I think this kale is the best for "beginners" to try as it has a more pleasing texture raw.


For K day, I decided to make something raw and gluten-free for those of you who are looking for more fun ways to eat that way. These pretty little rolls have lots of omega 3's thanks to the walnuts and lots of fiber and vitamins thanks to all of the fresh, fabulous veggies. Enjoy on their own or with some raw flax crackers.


Kick-Booty Kale Rolls with Kalamata Olive Flecked Walnut Meat

Makes 4 Rolls

1 cup raw walnuts, soaked overnight
8 fresh basil leaves, about 1/4 cup lightly packed
1 tablespoon chopped sun-dried tomato (oil packed)
1 clove fresh garlic, minced
1 teaspoon shoyu (if you want all raw) or tamari
1 teaspoon balsamic vinegar
1 tablespoon fresh lemon juice
2 tablespoons extra virgin cold pressed olive oil
6 kalamata olives
1 large carrot, grated
1/2 large red bell pepper, julienned
1 medium sized tomato, sliced thinly
1 handful of your favorite sprouts (I prefer pea or broccoli myself)

4 large kale (I use dinosaur or Lacinto), collard or chard leaves, taking care to remove woody part of stems but leaving large part of leaf intact.

Place walnuts, basil, sun-dried tomato, garlic, shoyu, balsamic vinegar, and lemon juice in bowl of food processor. Pulse together until mixture resembles a corse meal, scraping down the sides as needed. Turn processor to on and drizzle in olive oil, scraping sides between additions as needed. Once mixture is combined, add olives and pulse until olives are chopped coarsely.

If using kale leaves, spray lightly with lemon juice and lightly massage to make leaves more pliable. Place 1/4 cup walnut mixture on large end of leaf about 1 inch from the end. Top with carrots, a few slices of bell pepper, 2 slices tomato and sprouts. Roll fold in sides if leaves are large enough and roll up from large end to small end. Secure with toothpick. Serve immediately or refrigerate and serve the next day.


Tuesday, September 10, 2013

MoFo 2013 - Day 10 - I - Scream You Scream

You got it. I is for ice cream! Who doesn't love a sweet creamy bowl of rich, delicious ice cream. The first ice cream parlor in America was opened in 1776, which just happens to coincide with the birth of our nation. Seriously, it is Americana in a bowl. I'm sure most of you have some great childhood memory that involves getting all sticky from your favorite frozen treat. My personal favorites growing up were good old chocolate chip and orange sherbet. I still love the simpler flavors, but my palate has matured and I like to try some unusual flavors as well.

I've tried a few different commercial brands with mixed results, so I am experimenting with making my own. I like the idea of controlling how much and what type of sweeteners I use Fred is more the ice cream eater than I am, so he is going to be the final judge of my efforts. I do have Hannah Kaminsky's Vegan A La Mode, but the last two times I went to make something from it, I've been missing important ingredients for the ones I wanted to make. There are some exciting flavors in that book that I am excited to try like White Russian Ice Cream, Banana Pudding Ice Cream, Mouse Tracks Ice Cream to name a few.

But this time around, I decided to create my own. I'm a little pre-mature, but I am starting to dream about fall and winter flavors. The holidays will be here before we know it. Put away your rolling pin. This creation is like a frozen version of pumpkin pie without the crust.


Pumpkin Pie Ice Cream with Toasted Walnuts and Pecans

Makes a generous quart

2 cups soy creamer, separated
1 - 15 oz can organic pumpkin puree (not pumpkin pie filling)
1 1/2 tablespoons arrowroot
1/4 cup maple syrup
1/2 cup dark brown sugar*
1 teaspoon vanilla
1 teaspoon cinnamon
pinch nutmeg
1/2 cup chopped walnuts, toasted
1/2 cup chopped pecans, toasted

In a small bowl mix arrowroot and 1/4 cup soy creamer and set aside. In a heavy bottomed saucepan whisk together remaining soy creamer, pumpkin puree, maple syrup, dark brown sugar, vanilla, cinnamon and nutmeg. Turn heat to medium-low and cook until mixture just starts to boil, stirring frequently to prevent scorching. Remove from heat and whisk in arrowroot mixture. Whisk for 3-4 minute until mixture thickens slightly. Place in refrigerator and make sure to chill for a few hours until mixture is COLD. Churn the ice cream in your ice cream maker according to the manufacturers directions. About 1 minute before it finished, pour in chopped nuts. Let go one more minute to combine. Place ice cream in airtight sealed container and freeze for at least 4 hours.


Saturday, September 7, 2013

Mofo 2013 - Day 7 - F is for Freaking Awesome

F is for fun, which is what I am having coming up with ideas for this MoFo! This time I thought of perhaps doing some fritters, falafel, fricassee, frosted cupcakes, french onion soup, fresh fennel. All of which made me want to eat them. But what ended up happening is that I had some leftover rice in the fridge. I am famous for forgetting this kind of stuff in the fridge until it is stinky and garbage bound. I was super excited to save this batch of rice from the same fate.

The thing I love about cooking meals myself is that you can make things just how you like them. I love fried rice, but I often find that there is a lot of rice and not very many veggies. My version ups the veggie ratio and uses brown rice for added health benefits.


Fried Rice with Shiitakes and Broccoli

Makes 2 large portions

4 tablespoons toasted sesame oil, separated
2 large fresh shiitake mushrooms (about 1 cup when sliced)
pinch salt
1 1/2 cup small broccoli florets (about 1/2 inch size)
2 cups leftover long grain brown rice (I used basmati)
1 tablespoon low sodium tamari or soy sauce
1 teaspoon red or brown miso
1/3 cup thinly sliced green onions, green part only

In a wok or deep sauté pan, 2 tablespoons toasted sesame oil over medium low heat. Add shiitake mushrooms and sauté until they release their liquid and slightly softened, about 3-4 minutes. Add broccoli florets and sauté until they are bright green, about 3 minutes. Add a splash of water if the pan is too dry. Remove from pan and set aside in a bowl. Add remaining 2 tablespoons oil to hot pan and add rice. Saute until starts to get golden brown and slightly crunchy (just slightly). Stir in mushroom mixture, soy sauce and miso until well combined. Remove from heat and toss in green onions.

Serve immediately.

This is actually pretty darn good reheated as well!

*Can be GF if GF tamari is used.

Tuesday, September 3, 2013

Mofo 2013 - Day 3 - B is for Basil, Beans and Bruschetta

About a year and a half ago, we planted some basil in a half of an old wine barrel. I'm not sure if it was the variety of basil or the container, but it was never very happy. It grew strongly flavored tiny leaves that were just no fun to chiffonade. We did not have a loving relationship. This year, we planted Genovese basil in the garden. As you can see below, this plant is happy and is producing beautiful, fragrant, delicious leaves. Basil loves the sun, so AZ is a perfect place to grow it as long as you give it lots to drink.


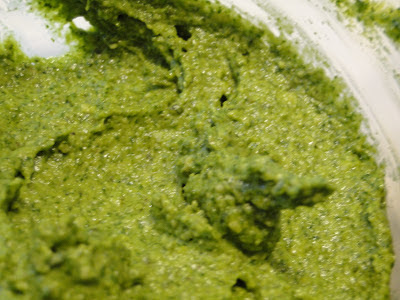
Pesto is a no-brainer for using the bounty of basil coming off of this plant. It's super easy to make, freezes great and makes dishes pop.

Basil-Spinach Pesto

Makes about 1 1/4 cup

3 cups lightly packed basil leaves, stems removed
3 cups lightly packed spinach leaves, large stems removed
1/4 cup nutritional yeast
5 cloves garlic, crushed
2 tablespoons fresh lemon juice
1/4 cup pine nuts
1/2 teaspoon salt
1/3 cup olive oil

Add basil and spinach to food processor with a large bowl. Pulse a few times to make more room in the bowl. Add remaining ingredients, except for olive oil. Pulse a few more times to roughly blend ingredients. Scrape down the sides of processor bowl. Turn processor to the on position. Slowly drizzle olive oil down the tube until mixture is well blended an emulsified. Pesto can be served immediately, stored in the fridge for up to a week or frozen in smaller batches for easy use later on. GF

Lets go for some more B action. True story. My step-daughter (I hate that term because it seems kind of impersonal and she is amazing) offered to cater her cousin's wedding last year. In turn, I volunteered to help. We made and ate so many bruschetta that weekend, we both swore we would probably not eat it for years to come. Well like childbirth and other painful experiences, the memory fades with time. I'm back to my bruschetta making and eating ways. This version featured another of my favorite "B" foods; beans. Cannelini Beans are perfect for a mediterranean appetizer. The salty and piquant capers and kalamatas compliment the mild creamy beans. Get some really crusty Italian baguette to make an impressive small plate for your friends.


Bruschetta with Mediterranean White Beans and Pesto

1 - 15 oz. can Cannelini beans, rinsed and drained
3 tablespoons chopped sun-dried tomatoes in oil, measure after chopping small
1 tablespoons capers
12 kalamata olives, quartered
2 tablespoons white balsamic vinegar
1 tablespoon olive oil from sun-dried tomatoes
salt and pepper to taste
1/3 cup Basil-Spinach Pesto (or your favorite pesto)
8 slices of toasted baguette
8 small basil leaves for garnish (optional)

In a medium size non-reactive bowl, combine beans, sun-dried tomatoes, capers, olives, vinegar, and olive oil. Taste and add salt and pepper to taste. The bean mixture can be used immediately, but I highly recommend giving it at least and hour to let the flavors meld and really get amazing. You can make this the day before as well.

Spread about 2-3 teaspoons basil on each slice of baguette. Top with about 2 tablespoons of bean mixture. Add a small dollop of pesto and a basil leaf on top for garnish.

Serve immediately.

Sunday, October 28, 2012

Iron Chef: Hot Chiles, Sunflower Seeds and Grapes


Today's Iron Chef entry is brought to you by the foods Hot Chile, Sunflower Seeds and Grapes. As I looked at this list of ingredients I was instantly psyched because hot chiles were part of the challenge. Sunflower seeds, no problem. It was the grapes that had me stumped. The only way I usually tend to consume grapes is in a good wine. I don't usually care for them with savory stuff and I figured a lot of my challengers would go the sweet route. What to do?

At first I was going to tackle a brunch dish. I had planned to make a breakfast sandwich. I thought maybe some type of biscuit with sunflower seeds in it and maybe some type of chile-grape jam. I set about making the jam and it ended up being the texture of applesauce. Had I not been so bummed out I may have thought to use it in a scone or something like that. Instead, I scrapped brunch as it was after 1pm by now.

I decided to get back to my love of the great Southwest and its flavorful and spicy personality. First I made a cilantro-sunflower seed pesto.


Cilantro-Sunflower Pesto

Yields 1 1/4 cups

3 cups lightly packed cilantro leaves (small stems are ok)
3 cloves garlic
1/3 cup sunflower seeds
1 tablespoon nutritional yeast
2 tablespoons fresh lemon juice
1 teaspoon Mexican oregano
1/2 teaspoon salt
1/2 teaspoon agave nectar
1/4 cup extra virgin olive oil

Place all ingredients except for the olive oil in the bowl of a food processor. Pulse to combine then run processor until well chopped. Slowly drizzle in the olive oil and let run until pesto is fairly smooth, scraping the sides once or twice.. Add more salt to taste if needed. Will keep in refrigerator for up to two weeks and will freeze for 6 months. GF

Next I got to marinating some tofu see recipe below.

Cilantro-Sunflower Pesto Marinated Tofu

1/2 cup vegetable broth
3 Tablespoons Cilantro-Sunflower Pesto
1 tablespoon Aji Panca Paste (can be found in some hispanic markets or online)
1 tablespoon low sodium tamari
8 oz. extra firm tofu, drained, pressed and sliced into 8 equal rectangular pieces

In an 8 x 8 baking dish whisk together marinade ingredients. Add tofu in a single layer. Marinade for at least 2 hours, preferably overnight, turning once.

Tofu can be grilled or baked in marinade.

Then I set about using those pesky grapes. I have to say the results far exceeded my expectations! This is what I came up with:


Grape-Avocado Pico de Gallo

1/2 cup green and red seedless grapes, quartered
2 medium red tomatoes, diced about 1/4" dice
1/2 cup tightly packed cilantro, coarsely chopped
1 very hot fresno (red) chile pepper, finely diced*
2 tablespoon red onion finely diced
juice of one lime
1/4 teaspoon cumin
1/8 teaspoon salt, or to taste
 1 small avocado, peeled and diced

In a medium sized bowl, combine grapes, tomatoes, cilantro, hot chile pepper, onion, lime juice, cumin and salt. After they are well combined, gently fold in diced avocado. Let sit for about 30 minutes to let flavors meld. Serve immediately. GF

* I feel it is very important to use a pretty hot variety of chile. It contrast the sweetness of the grapes beautifully.

So I had all the players lined up. I first thought I would make a tostada. That was until I realized after two trips to the store this morning, I had no lettuce or cabbage in my house. Two times was enough, so I switched gears. I had some corn tortillas in the fridge and a big ol' bottle of canola oil left over from a cooking class. Have you figured out where I'm going with this yet? Taquitos!!


Pesto Marinated Grilled Tofu and Black Bean Taquitos

1 recipe Cilantro-Sunflower Seed Pesto Marinated Tofu (see recipe above), reserve 1 tablespoon marinade
1 - 15 oz. can black beans, rinsed and drained
1/4 cup Cilantro-Sunflower Seed Pesto (see recipe above)
12 corn tortillas
1/3 cup Daiya Mozzerella Shreds
Oil for frying

Preheat grill to 350. Oil grill grates. Place sliced marinated tofu on hot grill and brush with marinade. Grill for 5 minutes or until nice grill marks appear and tofu is golden. Turn and brush other side with marinade. Grill for 5 more minutes until tofu is golden and slightly firm. Dice into 1/2 dice and set aside.

In small saucepan, combine black beans, 1 tablespoon reserved marinade and 1/4 cup pesto. Simmer over medium heat until beans are heated through. Gently stir in tofu and remove from heat.


Heat oil to 350. If you don't have a thermometer, use a small piece of tortilla to test heat. If it bubbles slightly, you are ready to go. It is really important to make sure the oil is not too hot or your taquitos will fall apart.

Assemble taquitos.

Take one tortilla at a time and place in oil for about 10 seconds to soften tortilla. It is very important to do this step to prevent tortillas from breaking apart. Carefully place softened tortilla on a paper towel lined plate. On end of tortilla closest to you, sprinkle 1-2 teaspoons shredded Daiya. Scoop approx. 2 tablespoons tofu-black bean mixture over Daiya in a straight line. Gently roll tortilla over filling until it resembles a cigar.

Here is the tricky part. These little guys like to unroll when you put them in the oil. I suppose you could use a pick to hold them shut, but they can tear pretty easily, so be careful if you pick 'em shut. If you successfully pick them, you could probably cook 2-3 at a time. I chose to cook one at a time and gently place them in the oil, seam side down, immediately holding the taquito with tongs using very light pressure. Fry for about 3 minutes, then turn over. Fry for about 2-3 more minutes or until beautifully golden. Using tongs drain excess oil from both ends of taquito. Place on paper towel lined plate, and repeat for remaining tortillas.

Serve immediately with a healthy serving of Grape-Avocado Pico de Gallo (recipe above).

Don't forget to comment on yesterday's post by midnight MST tonight (10/28/12) for a chance to win Vegan a la Mode...cuz you need a frozen dessert after this dish! The winner will be announced tomorrow!